

Flutter: Your Ultimate Guide to Modern App Development
In the dynamic world of app development, Flutter has emerged as a game-changing technology. It offers a unique blend of flexibility, efficiency, and exceptional performance. Whether you're an aspiring developer, an entrepreneur with a vision, or a company aiming to revolutionize your mobile presence, understanding Flutter is essential. In this blog post, we'll take you through a comprehensive introduction to Flutter, covering its history, project structure, UI development capabilities, architecture, and key terms that every Flutter enthusiast should grasp.
History of Flutter
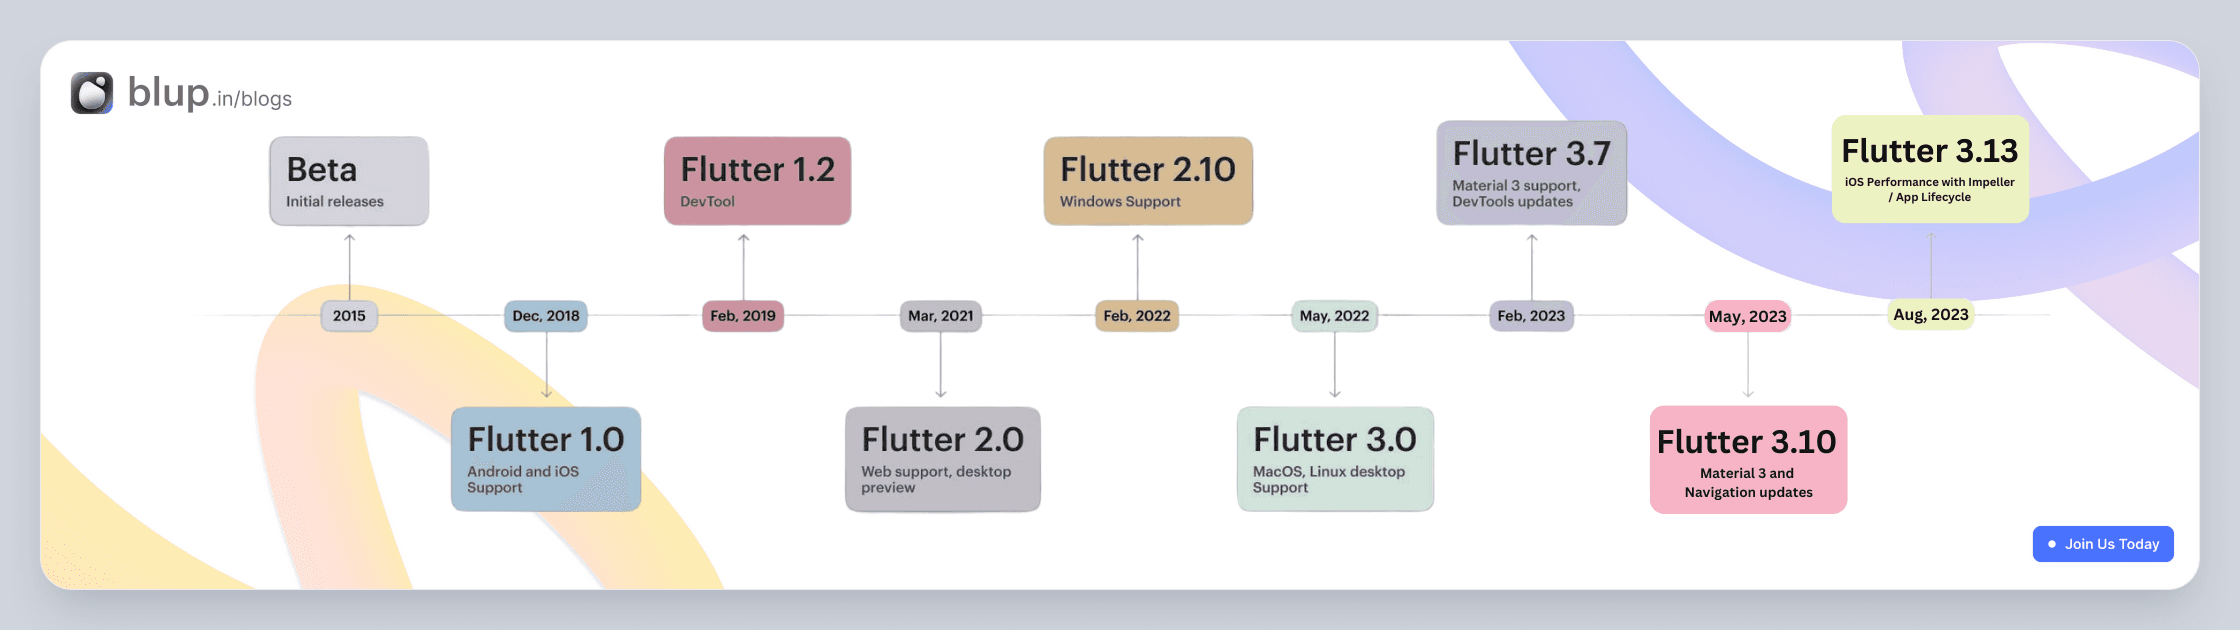
Flutter, introduced by Google, has rapidly evolved into a game-changer in the world of app development. Launched in 2017, It was officially launched as a stable release in December 2018, marking a significant milestone in the world of mobile app development. Flutter was created to address the challenges faced by developers who wanted to build beautiful and fast apps across multiple platforms without compromising on quality. it aimed to address the need for a single codebase that could create high-quality applications for multiple platforms.
Flutter Project Overview
Flutter Project Overview: Building Beautiful Cross-Platform Apps
In the dynamic world of mobile app development, businesses and developers are constantly seeking ways to build apps that are not only feature-rich but also efficient and cost-effective. Flutter, an open-source UI software development toolkit by Google, has emerged as a game-changer in this landscape. In this blog, we'll take a closer look at what a Flutter project is, its key components, and why it's becoming the go-to choice for building stunning cross-platform applications.
What is a Flutter Project?
A Flutter project is a software development endeavor that leverages the Flutter framework to build cross-platform applications. With Flutter, developers can create beautiful, natively compiled applications for mobile, web, and desktop from a single codebase. This single codebase approach eliminates the need to maintain separate codebases for Android and iOS, making development more efficient and cost-effective.
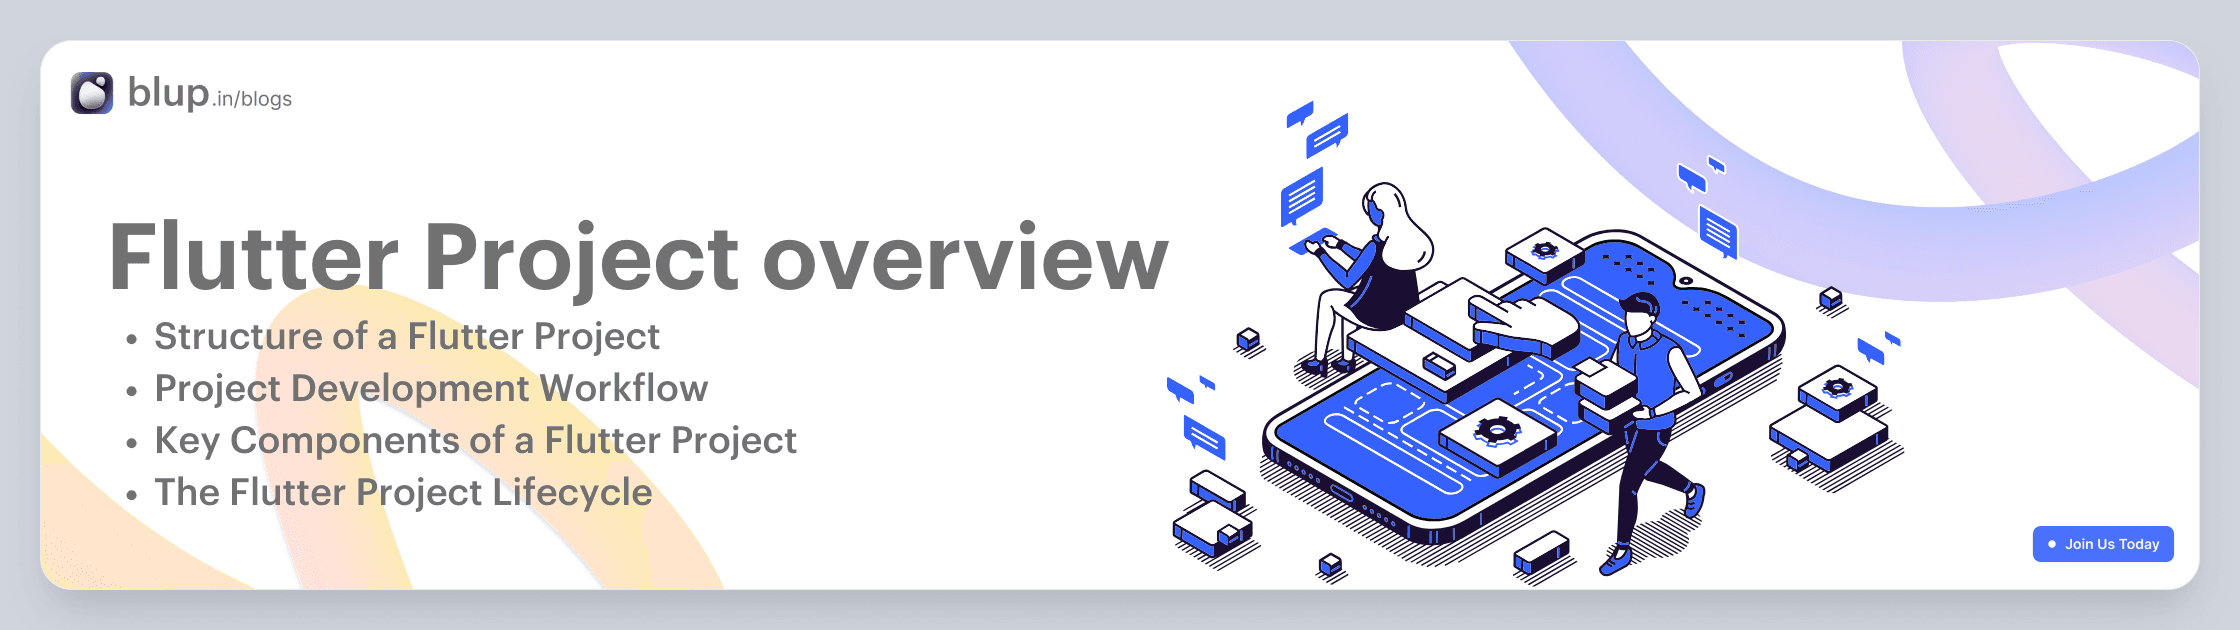
A Flutter project has a clear structure and follows a well-defined development workflow:
Structure of a Flutter Project:
A Flutter project consists of various directories and files. The most important ones include:
lib: This is where you write your Dart code, including the app's main logic.
assets: You can store assets like images, fonts, and configuration files here.
test: This directory is for writing tests for your Flutter app.
pubspec.yaml: This file defines your app's dependencies and assets.
Project Development Workflow:
Planning Architect: Develop a detailed project plan, including tasks, timelines, and resource allocation.
Requirements Gathering and Analysis: Work with stakeholders to gather and document detailed requirements for the project.
Write Code: Start by writing your Dart code in the lib directory. This is where you define your app's UI, logic, and behavior.
Customize Assets: Place your assets in the assets directory and reference them in your code.
Package Management: Manage your app's dependencies and assets in the pubspec.yaml file. Use the flutter pub get command to fetch dependencies.
Test Your App: Use the test directory to write unit tests and widget tests to ensure your app functions correctly.
Build and Debug: Use the flutter run command to build and launch your app on an emulator or physical device. The flutter doctor command helps diagnose any issues.
Optimize for Release: Before releasing your app, optimize it using the flutter build command, which generates APKs (for Android) or IPAs (for iOS).
Key Components of a Flutter Project:
Flutter SDK: The foundation of any Flutter project is the Flutter Software Development Kit (SDK). It includes everything you need to develop Flutter applications, including the Flutter framework, a rich set of pre-designed widgets, and a suite of command-line tools.
Dart Programming Language: Flutter apps are typically written in the Dart programming language, which is designed for fast development and high-performance execution. While Dart may not be as widely used as some other languages, it's relatively easy to learn and offers some unique features that benefit Flutter development.
Widgets: Widgets are the building blocks of Flutter applications. Everything in Flutter is a widget, from a simple button to an entire screen. Widgets are highly customizable and can be combined to create complex user interfaces.
Packages and Plugins: Flutter provides a vast ecosystem of packages and plugins contributed by the community. These packages add additional functionality to your app, such as integrating with third-party services, handling state management, and more.
IDE (Integrated Development Environment): While you can use any text editor to write Flutter code, popular IDEs like Android Studio, Visual Studio Code, and IntelliJ IDEA have extensions and plugins specifically designed for Flutter development, enhancing the developer experience.
Flutter DevTools: Flutter comes with a set of developer tools that help with debugging, profiling, and inspecting your app's performance. These tools, collectively known as Flutter DevTools, make it easier to identify and resolve issues during development.
The Flutter Project Lifecycle:
Project Setup: To start a Flutter project, you typically use the Flutter CLI to create a new project template. This template includes the necessary folder structure and initial files to get you started.
Coding and Design: You write Dart code to define the app's logic and create the user interface using Flutter widgets. Flutter's hot reload feature allows you to see changes in real-time, making the development process efficient.
Testing: You can test your app on emulators, simulators, or physical devices for both Android and iOS. Flutter provides a rich testing framework to ensure the app works as expected.
Debugging and Optimization: Flutter DevTools and other debugging tools help you identify and fix issues in your app. You can also optimize performance and make necessary adjustments during this phase.
Deployment: Once your app is ready, you can build it for various platforms, including Android, iOS, web, and desktop. Flutter provides tools to generate release builds and publish your app to app stores or the web.
Flutter UI

Flutter UI: Building Stunning Interfaces with Ease
In the realm of mobile and web application development, creating visually appealing and responsive user interfaces (UIs) is a critical factor in engaging users and ensuring the success of your app. Flutter, an open-source UI software development framework created by Google, has emerged as a game-changer, allowing developers to build beautiful and highly functional UIs with ease. In this blog post, we'll explore what Flutter UI is all about, why it's a popular choice, and provide a simple example to get you started.
What is Flutter UI?
Flutter UI refers to the user interface of an application built using the Flutter framework. Flutter UI development involves creating and designing the visual elements of an app, including layouts, widgets, and styles, to create an attractive and intuitive user experience.
Key Components of Flutter UI
Let's explore some key components of Flutter UI:
1. Widgets Flutter is built around the concept of widgets. Widgets are the building blocks of your UI. They range from basic elements like buttons and text to complex components like navigation drawers and lists. You can combine and customize widgets to create your desired UI.
2. Hot Reload Flutter's "hot reload" feature is a game-changer for developers. It allows you to make code changes and see the results in real-time without restarting the entire application. This speeds up development and enables quick experimentation.
3. Theming Flutter makes it easy to maintain a consistent visual identity for your app using theming. You can define a set of styles, colors, and fonts and apply them throughout your app. This ensures a cohesive and polished look.
4. Layout System Flutter provides a flexible and powerful layout system that allows you to create complex UI designs. You can use rows, columns, grids, and other layout widgets to arrange elements on the screen.
Why Choose Flutter for UI Development?
Flutter has gained immense popularity in the world of app development for several compelling reasons:
Single Codebase, Multiple Platforms Flutter allows you to write code once and deploy it on various platforms, including iOS, Android, web, and even desktop. This "write once, run anywhere" approach saves development time and ensures a consistent user experience across different devices.
Expressive Widgets Flutter offers a vast library of widgets that serve as building blocks for your UI. These widgets are highly customizable, enabling you to create pixel-perfect designs and responsive layouts. Whether you need buttons, text, images, or complex elements, Flutter has you covered.
Hot Reload Flutter's "hot reload" feature is a game-changer for developers. It allows you to make real-time changes to your code and see the results instantly on your device or emulator. This iterative development process speeds up UI development and encourages experimentation.
Performance Flutter apps are known for their high performance. They compile to native code, resulting in fast and smooth animations, responsive interactions, and a delightful user experience.
Building a Flutter UI: An Example
Let's create a simple Flutter UI example—a digital to-do list app.
1. Installation and Setup
To get started with Flutter, install it on your development machine following the official installation guide. Once installed, create a new Flutter project:
flutter create todo_app
cd todo_app
2. Design the UI
Open the lib/main.dart file in your preferred code editor. Replace the existing code with the following:
import 'package:flutter/material.dart';

void main() {
  runApp(MyApp());
}

class MyApp extends StatelessWidget {
  @override
  Widget build(BuildContext context) {
    return MaterialApp(
      home: Scaffold(
        appBar: AppBar(
          title: Text('To-Do List'),
        ),
        body: TodoList(),
      ),
    );
  }
}

class TodoList extends StatefulWidget {
  @override
  _TodoListState createState() => _TodoListState();
}

class _TodoListState extends State<TodoList> {
  List<String> todos = [];

  @override
  Widget build(BuildContext context) {
    return Column(
      children: [
        TextField(
          onSubmitted: (value) {
            setState(() {
              todos.add(value);
            });
          },
        ),
        Expanded(
          child: ListView.builder(
            itemCount: todos.length,
            itemBuilder: (context, index) {
              return ListTile(
                title: Text(todos[index]),
              );
            },
          ),
        ),
      ],
    );
  }
}
This code creates a simple to-do list app with a text input field to add tasks and a scrolling list to display them.
3. Running the App
To run the app, use the following command:
flutter runThis will launch your app on the device or emulator, and you can interact with your Flutter UI in real-time.
Example: Building a Simple Flutter UI
import 'package:flutter/material.dart';

void main() {
  runApp(MyApp());
}

class MyApp extends StatelessWidget {
  @override
  Widget build(BuildContext context) {
    return MaterialApp(
      title: 'To-Do List',
      home: TodoList(),
    );
  }
}

class TodoList extends StatelessWidget {
  @override
  Widget build(BuildContext context) {
    return Scaffold(
      appBar: AppBar(
        title: Text('My To-Do List'),
      ),
      body: ListView(
        children: [
          ListTile(title: Text('Task 1')),
          ListTile(title: Text('Task 2')),
          ListTile(title: Text('Task 3')),
          // Add more tasks here
        ],
      ),
      floatingActionButton: FloatingActionButton(
        onPressed: () {
          // Add task logic here
        },
        child: Icon(Icons.add),
      ),
    );
  }
Flutter Architecture
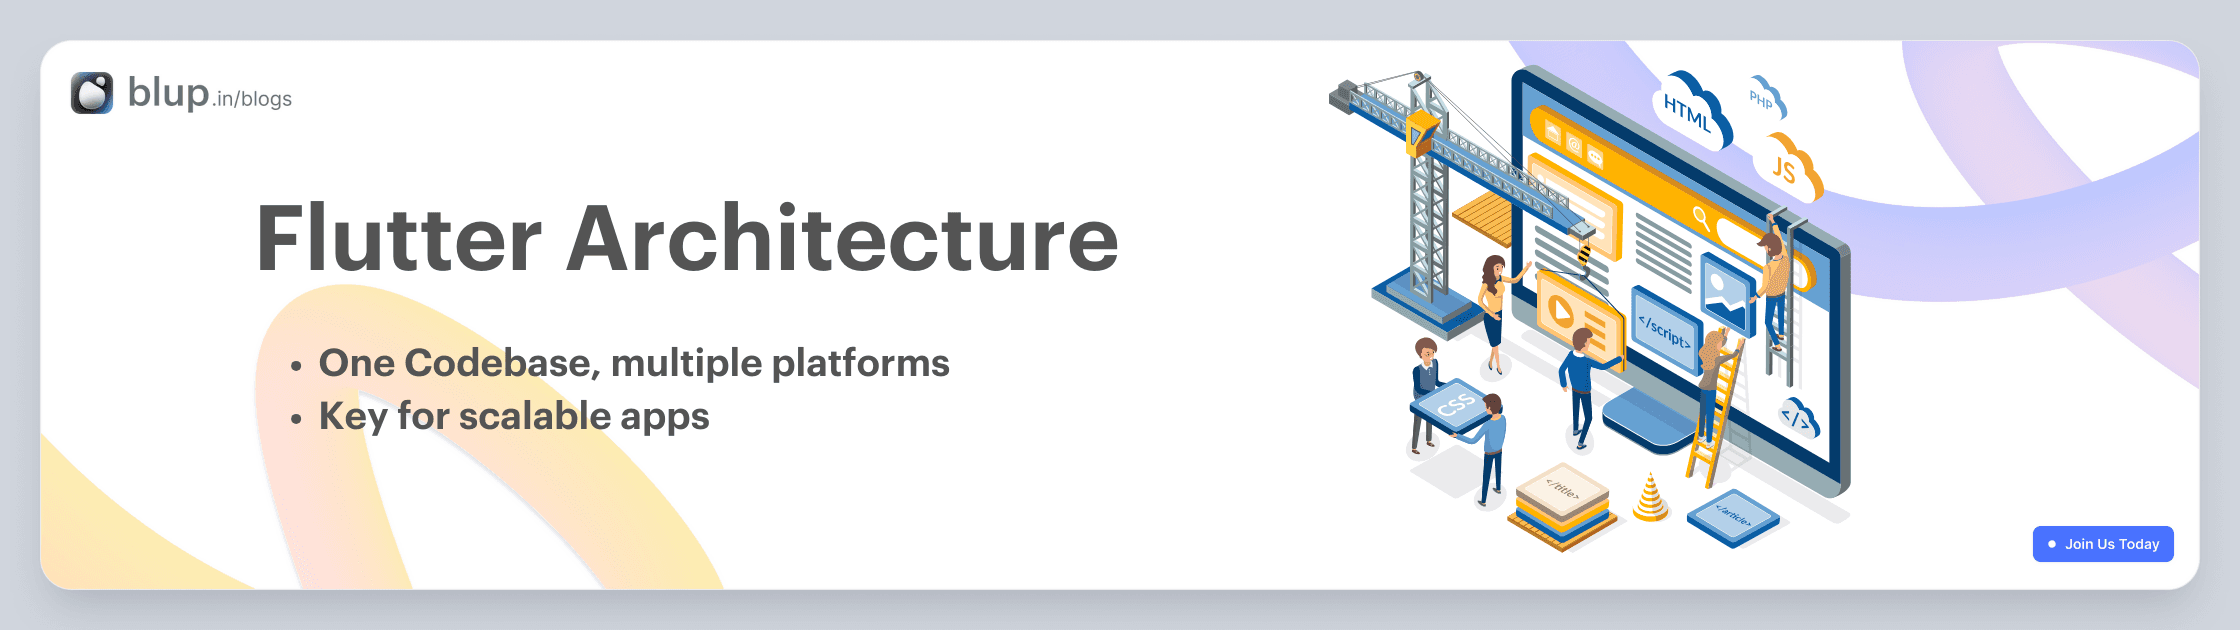
Flutter Architecture: A Brief Overview
Flutter, the open-source UI framework developed by Google, has gained immense popularity for its ability to create natively compiled applications for mobile, web, and desktop from a single codebase. Understanding its architecture is crucial for building scalable and maintainable Flutter apps. In this brief blog, we'll explore the fundamental aspects of Flutter architecture.
1. Widget-Based Architecture
Flutter's core architectural concept is its widget-based approach. In Flutter, everything is a widget. Widgets are the building blocks of your user interface. They can represent structural elements like buttons and containers or more complex components like entire screens or app layouts.
Flutter widgets are divided into two main categories:
-StatelessWidget:
These widgets are immutable and do not change their properties once they are built. They are suitable for displaying static content.
class MyAppBar extends StatelessWidget {
  @override
  Widget build(BuildContext context) {
    return AppBar(
      title: Text("My App"),
    );
  }
}
-StatefulWidget:
These widgets can change their properties over time, allowing you to build interactive and dynamic user interfaces. They have an associated mutable state object.
class CounterApp extends StatefulWidget {
  @override
  _CounterAppState createState() => _CounterAppState();
}

class _CounterAppState extends State<CounterApp> {
  int counter = 0;

  void incrementCounter() {
    setState(() {
      counter++;
    });
  }

  @override
  Widget build(BuildContext context) {
    return Column(
      children: <Widget>[
        Text("Counter: $counter"),
        ElevatedButton(
          onPressed: incrementCounter,
          child: Text("Increment"),
        ),
      ],
    );
  }
}
2. Reactive Framework
Flutter uses a reactive framework for building user interfaces. This means that when the state of a widget changes, the framework automatically rebuilds the widget tree. This reactive nature eliminates the need for manual DOM manipulation and simplifies UI updates.
The core mechanism behind this reactivity is the `setState` method, which informs Flutter that the widget's state has changed and triggers a rebuild of the widget and its descendants.
dart
setState(() {
  // Update widget state here
});
3. Layered Architecture
Flutter follows a layered architecture, which includes:
- Framework Layer: This is the foundation of Flutter, providing the core functionality for rendering, animation, and gestures.
- Engine Layer: The C/C++ engine of Flutter that communicates with the host operating system and hardware.
- Embedding Layer: This layer allows Flutter to integrate with various platforms, such as Android, iOS, web, and desktop, through platform-specific embedding code.
- Application Layer: Where your app-specific code resides, including UI design, business logic, and data management.
4. Hot Reload
One of Flutter's standout features is its hot reload capability. This allows developers to make changes to their code and see the results instantly in the running app, without the need to rebuild or restart the entire application. This feature greatly accelerates development and debugging processes.
5. Ecosystem and Packages
Flutter has a vibrant ecosystem with a wide range of packages and libraries available through pub.dev, the official package repository. These packages cover various functionalities, from state management to UI components and third-party integrations, making it easy to extend your app's capabilities.
Example: Building a Flutter App Architecture
Here's a simple example of how Flutter's architecture comes into play when building an app:
User Interface (UI) Layer: This is where you design your app's UI using various Flutter widgets like
Text,Container,ListView, etc.Business Logic Layer: You use
StatefulWidgetto manage the state and logic of interactive elements. For example, handling user input and updating counters as shown in the earlier code snippet.Data Layer: If your app requires data, you may connect it to a database or external API. You can use packages like
httporsqfliteto interact with data sources.Integration Layer: This is where you integrate your Flutter app with platform-specific features using plugins. For instance, you can access device features like the camera or GPS.
Testing and Debugging: Flutter provides excellent tools for testing and debugging your app, such as the Flutter DevTools and the Flutter testing framework.
Flutter Key terms

Flutter Key Terms: A Comprehensive Guide with Examples
Flutter is a popular open-source framework for building natively compiled applications for mobile, web, and desktop from a single codebase. Whether you're a beginner or an experienced developer, understanding key Flutter terms is essential for mastering this framework. In this blog post, we'll explore some of the most important key terms in Flutter, accompanied by practical examples to help you grasp their significance.
1. Widget In Flutter, everything is a widget. Widgets are the basic building blocks of your app's user interface. They can represent anything from a button to a layout to text. There are two types of widgets: StatelessWidget and StatefulWidget.
  @override
  Widget build(BuildContext context) {
    return Text("Hello, Flutter!");
  }
}
2. BuildContext BuildContext represents the location in the widget tree. It is often used for finding the nearest Scaffold, Theme, or Navigator.
Scaffold(
  appBar: AppBar(
    title: Text("My App"),
  ),
  body: Builder(
    builder: (BuildContext context) {
      return ElevatedButton(
        onPressed: () {
          Scaffold.of(context).showSnackBar(
            SnackBar(content: Text("Button Pressed")),
          );
        },
        child: Text("Press Me"),
      );
    },
  ),
)
3. StatelessWidget
A StatelessWidget is a widget that does not change its properties once it's built. It's commonly used for displaying static content.
class MyStatelessWidget extends StatelessWidget {
  @override
  Widget build(BuildContext context) {
    return Text("I'm a StatelessWidget");
  }
}
4. StatefulWidget A StatefulWidget is a widget that can change its properties over time. It is used for building interactive UI components.
class MyStatefulWidget extends StatefulWidget {
  @override
  _MyStatefulWidgetState createState() => _MyStatefulWidgetState();
}

class _MyStatefulWidgetState extends State<MyStatefulWidget> {
  int counter = 0;

  @override
  Widget build(BuildContext context) {
    return Column(
      children: [
        Text("Counter: $counter"),
        ElevatedButton(
          onPressed: () {
            setState(() {
              counter++;
            });
          },
          child: Text("Increment"),
        ),
      ],
    );
  }
}
5. Scaffold
A Scaffold is a basic structure for the visual elements of an app, providing support for app bars, drawers, floating action buttons, and more.
class MyApp extends StatelessWidget {
  @override
  Widget build(BuildContext context) {
    return MaterialApp(
      home: Scaffold(
        appBar: AppBar(
          title: Text('My App'),
        ),
        body: Center(
          child: Text('Welcome to my app!'),
        ),
        floatingActionButton: FloatingActionButton(
          onPressed: () {
            // Add your action here
          },
          child: Icon(Icons.add),
        ),
      ),
    );
  }
}
6. MaterialApp MaterialApp is a widget that defines the basic structure and layout of a Material Design app. It provides features like navigation, theme management, and more.
void main() {
  runApp(
    MaterialApp(
      title: "My App",
      home: MyHomePage(),
    ),
  );
}
7. Navigator The Navigator class is used for managing routes and navigation in your app. It allows you to push and pop screens onto/from the screen stack.
Navigator.push(
  context,
  MaterialPageRoute(builder: (context) => SecondScreen()),
);
8. Layout Widgets Flutter provides various layout widgets like Container, Column, Row, ListView, and Stack to structure your app's UI.
Column(
  children: [
    Text("Item 1"),
    Text("Item 2"),
    Text("Item 3"),
  ],
)
9. State Management Flutter offers various state management options, including Provider, Bloc, and Redux, to manage the state of your app efficiently.
final counterProvider = StateProvider<int>((ref) => 0);

...

final counter = ref.watch(counterProvider);
return Text("Counter: ${counter.state}");
ListView
A ListView is a scrollable list of widgets that allows you to display a large number of items efficiently.
ListView.builder(
  itemCount: items.length,
  itemBuilder: (BuildContext context, int index) {
    return ListTile(
      title: Text(items[index]),
    );
  },
)
11. Container
A Container is a widget used to create a box with specific dimensions and styling.
Container(
  width: 200,
  height: 100,
  color: Colors.blue,
  child: Center(
    child: Text('This is a Container'),
  ),
)
These key terms are fundamental to building Flutter apps. As you explore Flutter further, you'll encounter many more concepts and widgets, but mastering these terms is a great starting point for your Flutter journey. Happy Fluttering!
Why Choose a Flutter Project?
There are several compelling reasons to choose Flutter for your next app project:
Cross-Platform Compatibility: A single codebase can run on multiple platforms, reducing development time and maintenance costs.
High Performance: Flutter compiles to native ARM code, ensuring fast and responsive apps.
Hot Reload: One of the standout features of Flutter is its "Hot Reload" capability. Developers can instantly see the effects of code changes in their app, making the development process extremely efficient and iterative.
Beautiful UI: Flutter's customizable widgets and rich animations allow for stunning, pixel-perfect user interfaces.
Active Community: A vibrant Flutter community means you have access to a wealth of resources, packages, and support.
Cost-Efficiency: Building for multiple platforms from a single codebase saves money and effort.
Widgets: Flutter uses a widget-based approach for building user interfaces. Everything in Flutter is a widget, from buttons to entire screens. This widget-centric architecture allows for easy customization and reusability of components.
Single Codebase: With Flutter, you write a single codebase that can run on both Android and iOS platforms. This not only reduces development time but also minimizes the chances of platform-specific bugs.
Time: It has a single codebase feature and hot-reload features that allow us to build one code only and that app will work on both Android and iOS platforms. So you can save a lot of time while it has been taken while developing a native app for Android and iOS separately.
What are companies are using Flutter?
There are top companies using flutter. I am listing some of the world's best companies that are using Flutter.
Google: Google using flutter as app development. And you will find that app on play store or you might be using it. Google ads, Google Assistance the two most popular app build by Google on Flutter that max people have been using in daily life.
Alibaba: Alibaba Group now builds its mobile app on Flutter. Alibaba is the world's largest eCommerce site for commodities.
Groupon: Groupon has been introduced its mobile app on Flutter.
BMW: As per Flutter's official site now BMW starts using Flutter after update of Flutter 1.9.
eBay: Now, eBay has been introducing Flutter as a mobile app development to get fast and better performance.
AirtelTigo: Now they developed their mobile application on Flutter to provide all solutions with one application. As per communication their app has been developed and maintained by Ionicfirebaseapp.com. Their application has been providing the caller, money transfer, credit transfer and others feature with their mobile app.
Like that there are other companies have been started using Flutter you can see Flutter Showcase blup.in/blogs
Apart from this, we have written other in-detail articles on Flutter and mobile app development. You can find them below:
Best Flutter Learning Roadmap in 2023 to become a top Flutter Developer
Flutter Developer Learning Roadmap: Unveiling the Power of Dart
In conclusion, Flutter is revolutionizing mobile app development by offering a powerful and efficient framework for creating cross-platform applications. Whether you are a seasoned developer or new to app development, Flutter's structured approach, robust UI capabilities, and flexible architecture make it an exciting journey for creating exceptional apps. Explore the endless possibilities with Flutter and witness the future of app development unfold before your eyes.
In the dynamic world of app development, Flutter has emerged as a game-changing technology. It offers a unique blend of flexibility, efficiency, and exceptional performance. Whether you're an aspiring developer, an entrepreneur with a vision, or a company aiming to revolutionize your mobile presence, understanding Flutter is essential. In this blog post, we'll take you through a comprehensive introduction to Flutter, covering its history, project structure, UI development capabilities, architecture, and key terms that every Flutter enthusiast should grasp.
History of Flutter
Flutter, introduced by Google, has rapidly evolved into a game-changer in the world of app development. Launched in 2017, It was officially launched as a stable release in December 2018, marking a significant milestone in the world of mobile app development. Flutter was created to address the challenges faced by developers who wanted to build beautiful and fast apps across multiple platforms without compromising on quality. it aimed to address the need for a single codebase that could create high-quality applications for multiple platforms.
Flutter Project Overview
Flutter Project Overview: Building Beautiful Cross-Platform Apps
In the dynamic world of mobile app development, businesses and developers are constantly seeking ways to build apps that are not only feature-rich but also efficient and cost-effective. Flutter, an open-source UI software development toolkit by Google, has emerged as a game-changer in this landscape. In this blog, we'll take a closer look at what a Flutter project is, its key components, and why it's becoming the go-to choice for building stunning cross-platform applications.
What is a Flutter Project?
A Flutter project is a software development endeavor that leverages the Flutter framework to build cross-platform applications. With Flutter, developers can create beautiful, natively compiled applications for mobile, web, and desktop from a single codebase. This single codebase approach eliminates the need to maintain separate codebases for Android and iOS, making development more efficient and cost-effective.
A Flutter project has a clear structure and follows a well-defined development workflow:
Structure of a Flutter Project:
A Flutter project consists of various directories and files. The most important ones include:
lib: This is where you write your Dart code, including the app's main logic.
assets: You can store assets like images, fonts, and configuration files here.
test: This directory is for writing tests for your Flutter app.
pubspec.yaml: This file defines your app's dependencies and assets.
Project Development Workflow:
Planning Architect: Develop a detailed project plan, including tasks, timelines, and resource allocation.
Requirements Gathering and Analysis: Work with stakeholders to gather and document detailed requirements for the project.
Write Code: Start by writing your Dart code in the lib directory. This is where you define your app's UI, logic, and behavior.
Customize Assets: Place your assets in the assets directory and reference them in your code.
Package Management: Manage your app's dependencies and assets in the pubspec.yaml file. Use the flutter pub get command to fetch dependencies.
Test Your App: Use the test directory to write unit tests and widget tests to ensure your app functions correctly.
Build and Debug: Use the flutter run command to build and launch your app on an emulator or physical device. The flutter doctor command helps diagnose any issues.
Optimize for Release: Before releasing your app, optimize it using the flutter build command, which generates APKs (for Android) or IPAs (for iOS).
Key Components of a Flutter Project:
Flutter SDK: The foundation of any Flutter project is the Flutter Software Development Kit (SDK). It includes everything you need to develop Flutter applications, including the Flutter framework, a rich set of pre-designed widgets, and a suite of command-line tools.
Dart Programming Language: Flutter apps are typically written in the Dart programming language, which is designed for fast development and high-performance execution. While Dart may not be as widely used as some other languages, it's relatively easy to learn and offers some unique features that benefit Flutter development.
Widgets: Widgets are the building blocks of Flutter applications. Everything in Flutter is a widget, from a simple button to an entire screen. Widgets are highly customizable and can be combined to create complex user interfaces.
Packages and Plugins: Flutter provides a vast ecosystem of packages and plugins contributed by the community. These packages add additional functionality to your app, such as integrating with third-party services, handling state management, and more.
IDE (Integrated Development Environment): While you can use any text editor to write Flutter code, popular IDEs like Android Studio, Visual Studio Code, and IntelliJ IDEA have extensions and plugins specifically designed for Flutter development, enhancing the developer experience.
Flutter DevTools: Flutter comes with a set of developer tools that help with debugging, profiling, and inspecting your app's performance. These tools, collectively known as Flutter DevTools, make it easier to identify and resolve issues during development.
The Flutter Project Lifecycle:
Project Setup: To start a Flutter project, you typically use the Flutter CLI to create a new project template. This template includes the necessary folder structure and initial files to get you started.
Coding and Design: You write Dart code to define the app's logic and create the user interface using Flutter widgets. Flutter's hot reload feature allows you to see changes in real-time, making the development process efficient.
Testing: You can test your app on emulators, simulators, or physical devices for both Android and iOS. Flutter provides a rich testing framework to ensure the app works as expected.
Debugging and Optimization: Flutter DevTools and other debugging tools help you identify and fix issues in your app. You can also optimize performance and make necessary adjustments during this phase.
Deployment: Once your app is ready, you can build it for various platforms, including Android, iOS, web, and desktop. Flutter provides tools to generate release builds and publish your app to app stores or the web.
Flutter UI
Flutter UI: Building Stunning Interfaces with Ease
In the realm of mobile and web application development, creating visually appealing and responsive user interfaces (UIs) is a critical factor in engaging users and ensuring the success of your app. Flutter, an open-source UI software development framework created by Google, has emerged as a game-changer, allowing developers to build beautiful and highly functional UIs with ease. In this blog post, we'll explore what Flutter UI is all about, why it's a popular choice, and provide a simple example to get you started.
What is Flutter UI?
Flutter UI refers to the user interface of an application built using the Flutter framework. Flutter UI development involves creating and designing the visual elements of an app, including layouts, widgets, and styles, to create an attractive and intuitive user experience.
Key Components of Flutter UI
Let's explore some key components of Flutter UI:
1. Widgets Flutter is built around the concept of widgets. Widgets are the building blocks of your UI. They range from basic elements like buttons and text to complex components like navigation drawers and lists. You can combine and customize widgets to create your desired UI.
2. Hot Reload Flutter's "hot reload" feature is a game-changer for developers. It allows you to make code changes and see the results in real-time without restarting the entire application. This speeds up development and enables quick experimentation.
3. Theming Flutter makes it easy to maintain a consistent visual identity for your app using theming. You can define a set of styles, colors, and fonts and apply them throughout your app. This ensures a cohesive and polished look.
4. Layout System Flutter provides a flexible and powerful layout system that allows you to create complex UI designs. You can use rows, columns, grids, and other layout widgets to arrange elements on the screen.
Why Choose Flutter for UI Development?
Flutter has gained immense popularity in the world of app development for several compelling reasons:
Single Codebase, Multiple Platforms Flutter allows you to write code once and deploy it on various platforms, including iOS, Android, web, and even desktop. This "write once, run anywhere" approach saves development time and ensures a consistent user experience across different devices.
Expressive Widgets Flutter offers a vast library of widgets that serve as building blocks for your UI. These widgets are highly customizable, enabling you to create pixel-perfect designs and responsive layouts. Whether you need buttons, text, images, or complex elements, Flutter has you covered.
Hot Reload Flutter's "hot reload" feature is a game-changer for developers. It allows you to make real-time changes to your code and see the results instantly on your device or emulator. This iterative development process speeds up UI development and encourages experimentation.
Performance Flutter apps are known for their high performance. They compile to native code, resulting in fast and smooth animations, responsive interactions, and a delightful user experience.
Building a Flutter UI: An Example
Let's create a simple Flutter UI example—a digital to-do list app.
1. Installation and Setup
To get started with Flutter, install it on your development machine following the official installation guide. Once installed, create a new Flutter project:
flutter create todo_app
cd todo_app
2. Design the UI
Open the lib/main.dart file in your preferred code editor. Replace the existing code with the following:
import 'package:flutter/material.dart';

void main() {
  runApp(MyApp());
}

class MyApp extends StatelessWidget {
  @override
  Widget build(BuildContext context) {
    return MaterialApp(
      home: Scaffold(
        appBar: AppBar(
          title: Text('To-Do List'),
        ),
        body: TodoList(),
      ),
    );
  }
}

class TodoList extends StatefulWidget {
  @override
  _TodoListState createState() => _TodoListState();
}

class _TodoListState extends State<TodoList> {
  List<String> todos = [];

  @override
  Widget build(BuildContext context) {
    return Column(
      children: [
        TextField(
          onSubmitted: (value) {
            setState(() {
              todos.add(value);
            });
          },
        ),
        Expanded(
          child: ListView.builder(
            itemCount: todos.length,
            itemBuilder: (context, index) {
              return ListTile(
                title: Text(todos[index]),
              );
            },
          ),
        ),
      ],
    );
  }
}
This code creates a simple to-do list app with a text input field to add tasks and a scrolling list to display them.
3. Running the App
To run the app, use the following command:
flutter runThis will launch your app on the device or emulator, and you can interact with your Flutter UI in real-time.
Example: Building a Simple Flutter UI
import 'package:flutter/material.dart';

void main() {
  runApp(MyApp());
}

class MyApp extends StatelessWidget {
  @override
  Widget build(BuildContext context) {
    return MaterialApp(
      title: 'To-Do List',
      home: TodoList(),
    );
  }
}

class TodoList extends StatelessWidget {
  @override
  Widget build(BuildContext context) {
    return Scaffold(
      appBar: AppBar(
        title: Text('My To-Do List'),
      ),
      body: ListView(
        children: [
          ListTile(title: Text('Task 1')),
          ListTile(title: Text('Task 2')),
          ListTile(title: Text('Task 3')),
          // Add more tasks here
        ],
      ),
      floatingActionButton: FloatingActionButton(
        onPressed: () {
          // Add task logic here
        },
        child: Icon(Icons.add),
      ),
    );
  }
Flutter Architecture
Flutter Architecture: A Brief Overview
Flutter, the open-source UI framework developed by Google, has gained immense popularity for its ability to create natively compiled applications for mobile, web, and desktop from a single codebase. Understanding its architecture is crucial for building scalable and maintainable Flutter apps. In this brief blog, we'll explore the fundamental aspects of Flutter architecture.
1. Widget-Based Architecture
Flutter's core architectural concept is its widget-based approach. In Flutter, everything is a widget. Widgets are the building blocks of your user interface. They can represent structural elements like buttons and containers or more complex components like entire screens or app layouts.
Flutter widgets are divided into two main categories:
-StatelessWidget:
These widgets are immutable and do not change their properties once they are built. They are suitable for displaying static content.
class MyAppBar extends StatelessWidget {
  @override
  Widget build(BuildContext context) {
    return AppBar(
      title: Text("My App"),
    );
  }
}
-StatefulWidget:
These widgets can change their properties over time, allowing you to build interactive and dynamic user interfaces. They have an associated mutable state object.
class CounterApp extends StatefulWidget {
  @override
  _CounterAppState createState() => _CounterAppState();
}

class _CounterAppState extends State<CounterApp> {
  int counter = 0;

  void incrementCounter() {
    setState(() {
      counter++;
    });
  }

  @override
  Widget build(BuildContext context) {
    return Column(
      children: <Widget>[
        Text("Counter: $counter"),
        ElevatedButton(
          onPressed: incrementCounter,
          child: Text("Increment"),
        ),
      ],
    );
  }
}
2. Reactive Framework
Flutter uses a reactive framework for building user interfaces. This means that when the state of a widget changes, the framework automatically rebuilds the widget tree. This reactive nature eliminates the need for manual DOM manipulation and simplifies UI updates.
The core mechanism behind this reactivity is the `setState` method, which informs Flutter that the widget's state has changed and triggers a rebuild of the widget and its descendants.
dart
setState(() {
  // Update widget state here
});
3. Layered Architecture
Flutter follows a layered architecture, which includes:
- Framework Layer: This is the foundation of Flutter, providing the core functionality for rendering, animation, and gestures.
- Engine Layer: The C/C++ engine of Flutter that communicates with the host operating system and hardware.
- Embedding Layer: This layer allows Flutter to integrate with various platforms, such as Android, iOS, web, and desktop, through platform-specific embedding code.
- Application Layer: Where your app-specific code resides, including UI design, business logic, and data management.
4. Hot Reload
One of Flutter's standout features is its hot reload capability. This allows developers to make changes to their code and see the results instantly in the running app, without the need to rebuild or restart the entire application. This feature greatly accelerates development and debugging processes.
5. Ecosystem and Packages
Flutter has a vibrant ecosystem with a wide range of packages and libraries available through pub.dev, the official package repository. These packages cover various functionalities, from state management to UI components and third-party integrations, making it easy to extend your app's capabilities.
Example: Building a Flutter App Architecture
Here's a simple example of how Flutter's architecture comes into play when building an app:
User Interface (UI) Layer: This is where you design your app's UI using various Flutter widgets like
Text,Container,ListView, etc.Business Logic Layer: You use
StatefulWidgetto manage the state and logic of interactive elements. For example, handling user input and updating counters as shown in the earlier code snippet.Data Layer: If your app requires data, you may connect it to a database or external API. You can use packages like
httporsqfliteto interact with data sources.Integration Layer: This is where you integrate your Flutter app with platform-specific features using plugins. For instance, you can access device features like the camera or GPS.
Testing and Debugging: Flutter provides excellent tools for testing and debugging your app, such as the Flutter DevTools and the Flutter testing framework.
Flutter Key terms
Flutter Key Terms: A Comprehensive Guide with Examples
Flutter is a popular open-source framework for building natively compiled applications for mobile, web, and desktop from a single codebase. Whether you're a beginner or an experienced developer, understanding key Flutter terms is essential for mastering this framework. In this blog post, we'll explore some of the most important key terms in Flutter, accompanied by practical examples to help you grasp their significance.
1. Widget In Flutter, everything is a widget. Widgets are the basic building blocks of your app's user interface. They can represent anything from a button to a layout to text. There are two types of widgets: StatelessWidget and StatefulWidget.
  @override
  Widget build(BuildContext context) {
    return Text("Hello, Flutter!");
  }
}
2. BuildContext BuildContext represents the location in the widget tree. It is often used for finding the nearest Scaffold, Theme, or Navigator.
Scaffold(
  appBar: AppBar(
    title: Text("My App"),
  ),
  body: Builder(
    builder: (BuildContext context) {
      return ElevatedButton(
        onPressed: () {
          Scaffold.of(context).showSnackBar(
            SnackBar(content: Text("Button Pressed")),
          );
        },
        child: Text("Press Me"),
      );
    },
  ),
)
3. StatelessWidget
A StatelessWidget is a widget that does not change its properties once it's built. It's commonly used for displaying static content.
class MyStatelessWidget extends StatelessWidget {
  @override
  Widget build(BuildContext context) {
    return Text("I'm a StatelessWidget");
  }
}
4. StatefulWidget A StatefulWidget is a widget that can change its properties over time. It is used for building interactive UI components.
class MyStatefulWidget extends StatefulWidget {
  @override
  _MyStatefulWidgetState createState() => _MyStatefulWidgetState();
}

class _MyStatefulWidgetState extends State<MyStatefulWidget> {
  int counter = 0;

  @override
  Widget build(BuildContext context) {
    return Column(
      children: [
        Text("Counter: $counter"),
        ElevatedButton(
          onPressed: () {
            setState(() {
              counter++;
            });
          },
          child: Text("Increment"),
        ),
      ],
    );
  }
}
5. Scaffold
A Scaffold is a basic structure for the visual elements of an app, providing support for app bars, drawers, floating action buttons, and more.
class MyApp extends StatelessWidget {
  @override
  Widget build(BuildContext context) {
    return MaterialApp(
      home: Scaffold(
        appBar: AppBar(
          title: Text('My App'),
        ),
        body: Center(
          child: Text('Welcome to my app!'),
        ),
        floatingActionButton: FloatingActionButton(
          onPressed: () {
            // Add your action here
          },
          child: Icon(Icons.add),
        ),
      ),
    );
  }
}
6. MaterialApp MaterialApp is a widget that defines the basic structure and layout of a Material Design app. It provides features like navigation, theme management, and more.
void main() {
  runApp(
    MaterialApp(
      title: "My App",
      home: MyHomePage(),
    ),
  );
}
7. Navigator The Navigator class is used for managing routes and navigation in your app. It allows you to push and pop screens onto/from the screen stack.
Navigator.push(
  context,
  MaterialPageRoute(builder: (context) => SecondScreen()),
);
8. Layout Widgets Flutter provides various layout widgets like Container, Column, Row, ListView, and Stack to structure your app's UI.
Column(
  children: [
    Text("Item 1"),
    Text("Item 2"),
    Text("Item 3"),
  ],
)
9. State Management Flutter offers various state management options, including Provider, Bloc, and Redux, to manage the state of your app efficiently.
final counterProvider = StateProvider<int>((ref) => 0);

...

final counter = ref.watch(counterProvider);
return Text("Counter: ${counter.state}");
ListView
A ListView is a scrollable list of widgets that allows you to display a large number of items efficiently.
ListView.builder(
  itemCount: items.length,
  itemBuilder: (BuildContext context, int index) {
    return ListTile(
      title: Text(items[index]),
    );
  },
)
11. Container
A Container is a widget used to create a box with specific dimensions and styling.
Container(
  width: 200,
  height: 100,
  color: Colors.blue,
  child: Center(
    child: Text('This is a Container'),
  ),
)
These key terms are fundamental to building Flutter apps. As you explore Flutter further, you'll encounter many more concepts and widgets, but mastering these terms is a great starting point for your Flutter journey. Happy Fluttering!
Why Choose a Flutter Project?
There are several compelling reasons to choose Flutter for your next app project:
Cross-Platform Compatibility: A single codebase can run on multiple platforms, reducing development time and maintenance costs.
High Performance: Flutter compiles to native ARM code, ensuring fast and responsive apps.
Hot Reload: One of the standout features of Flutter is its "Hot Reload" capability. Developers can instantly see the effects of code changes in their app, making the development process extremely efficient and iterative.
Beautiful UI: Flutter's customizable widgets and rich animations allow for stunning, pixel-perfect user interfaces.
Active Community: A vibrant Flutter community means you have access to a wealth of resources, packages, and support.
Cost-Efficiency: Building for multiple platforms from a single codebase saves money and effort.
Widgets: Flutter uses a widget-based approach for building user interfaces. Everything in Flutter is a widget, from buttons to entire screens. This widget-centric architecture allows for easy customization and reusability of components.
Single Codebase: With Flutter, you write a single codebase that can run on both Android and iOS platforms. This not only reduces development time but also minimizes the chances of platform-specific bugs.
Time: It has a single codebase feature and hot-reload features that allow us to build one code only and that app will work on both Android and iOS platforms. So you can save a lot of time while it has been taken while developing a native app for Android and iOS separately.
What are companies are using Flutter?
There are top companies using flutter. I am listing some of the world's best companies that are using Flutter.
Google: Google using flutter as app development. And you will find that app on play store or you might be using it. Google ads, Google Assistance the two most popular app build by Google on Flutter that max people have been using in daily life.
Alibaba: Alibaba Group now builds its mobile app on Flutter. Alibaba is the world's largest eCommerce site for commodities.
Groupon: Groupon has been introduced its mobile app on Flutter.
BMW: As per Flutter's official site now BMW starts using Flutter after update of Flutter 1.9.
eBay: Now, eBay has been introducing Flutter as a mobile app development to get fast and better performance.
AirtelTigo: Now they developed their mobile application on Flutter to provide all solutions with one application. As per communication their app has been developed and maintained by Ionicfirebaseapp.com. Their application has been providing the caller, money transfer, credit transfer and others feature with their mobile app.
Like that there are other companies have been started using Flutter you can see Flutter Showcase blup.in/blogs
Apart from this, we have written other in-detail articles on Flutter and mobile app development. You can find them below:
Best Flutter Learning Roadmap in 2023 to become a top Flutter Developer
Flutter Developer Learning Roadmap: Unveiling the Power of Dart
In conclusion, Flutter is revolutionizing mobile app development by offering a powerful and efficient framework for creating cross-platform applications. Whether you are a seasoned developer or new to app development, Flutter's structured approach, robust UI capabilities, and flexible architecture make it an exciting journey for creating exceptional apps. Explore the endless possibilities with Flutter and witness the future of app development unfold before your eyes.


© 2021-25 Blupx Private Limited.
All rights reserved.
© 2021-25 Blupx Private Limited.
All rights reserved.
© 2021-25 Blupx Private Limited.
All rights reserved.