

Stateful vs. Stateless Widgets: Build Dynamic UIs in Flutter.

Introduction
Introduction
Introduction
Introduction
Welcome to the realm of Flutter widgets, the building blocks of stunning user interfaces! Flutter, Google's open-source UI toolkit, revolutionizes app development by offering a seamless experience across platforms. With Flutter, developers can craft visually appealing and performant applications for mobile, web, and desktop from a single codebase.
Here are some fascinating facts about Flutter:
Introduced by Google in 2017, Flutter has rapidly gained popularity in the developer community.
It utilizes the Dart programming language, also developed by Google, for building applications.
Flutter boasts a fast development cycle and features like hot reload, enabling instant code change reflection without losing the app's state.
Advantages of Flutter include:
Single codebase: Develop for multiple platforms using the same codebase, reducing development time and effort.
Expressive UI: Flutter's rich set of customizable widgets allows developers to create beautiful and dynamic user interfaces.
Native performance: Flutter apps compile to native machine code, delivering excellent performance and smooth animations across platforms.
Understanding Widgets
Understanding Widgets
Understanding Widgets
Understanding Widgets
Create Responsive Flutter Apps: The Key to Stateful and Stateless Widgets.
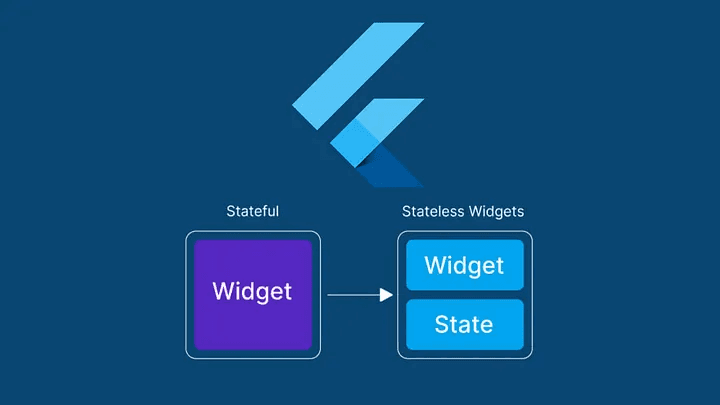
Flutter widgets serve as the fundamental building blocks for creating user interfaces in Flutter applications. Widgets in Flutter can be thought of as reusable components, ranging from simple elements like buttons and text to more complex structures such as lists and grids. There are two main types of widgets in Flutter: StatelessWidget and StatefulWidget.
StatelessWidget: These widgets are immutable, meaning their properties cannot change once set. They represent elements in the user interface that do not change dynamically.
StatefulWidget: These widgets are mutable and can change dynamically. They are used for elements in the user interface that may change or interact with user input.
Widgets in Flutter follow a hierarchical structure, forming a tree known as the "widget tree." This tree represents the visual hierarchy of the application, where each widget contains information about how it should be rendered on the screen.
Overall, Flutter widgets serve as the foundation for creating visually appealing and responsive user interfaces across different platforms, including mobile, web, and desktop. With Flutter's extensive library of widgets and flexible architecture, developers can efficiently design and customize UIs to meet their application requirements.
Create Responsive Flutter Apps: The Key to Stateful and Stateless Widgets.
Flutter widgets serve as the fundamental building blocks for creating user interfaces in Flutter applications. Widgets in Flutter can be thought of as reusable components, ranging from simple elements like buttons and text to more complex structures such as lists and grids. There are two main types of widgets in Flutter: StatelessWidget and StatefulWidget.
StatelessWidget: These widgets are immutable, meaning their properties cannot change once set. They represent elements in the user interface that do not change dynamically.
StatefulWidget: These widgets are mutable and can change dynamically. They are used for elements in the user interface that may change or interact with user input.
Widgets in Flutter follow a hierarchical structure, forming a tree known as the "widget tree." This tree represents the visual hierarchy of the application, where each widget contains information about how it should be rendered on the screen.
Overall, Flutter widgets serve as the foundation for creating visually appealing and responsive user interfaces across different platforms, including mobile, web, and desktop. With Flutter's extensive library of widgets and flexible architecture, developers can efficiently design and customize UIs to meet their application requirements.
Stateful vs Stateless Widgets:
Stateful vs Stateless Widgets:
Stateful vs Stateless Widgets:
Stateful vs Stateless Widgets:
Boost Your Flutter Performance: Choosing the Right Widget (Stateful vs. Stateless).
In Flutter apps, widgets are the building blocks, broadly categorized into two types:
Stateless Widget
Stateful Widget
State:
Before knowing the difference between the stateless and stateful widget we should take a look at the definition of State of a widget.
The State is information that can be read synchronously when the widget is build and might change during the lifetime of the widget.
The state of an app can very simply be defined as anything that exists in the memory of the app while the app is running. This includes all the widgets that maintain the UI of the app including the buttons, text fonts, icons, animations, etc. So now as we know what are these states let’s dive directly into our main topic i.e what are these stateful and stateless widgets and how do they differ from one another?
In other words, the state of the widget is the data of the objects that its properties (parameters) are sustaining at the time of its creation (when the widget is painted on the screen). The state can also change when it is used for example when a CheckBox widget is clicked a check appears on the box.
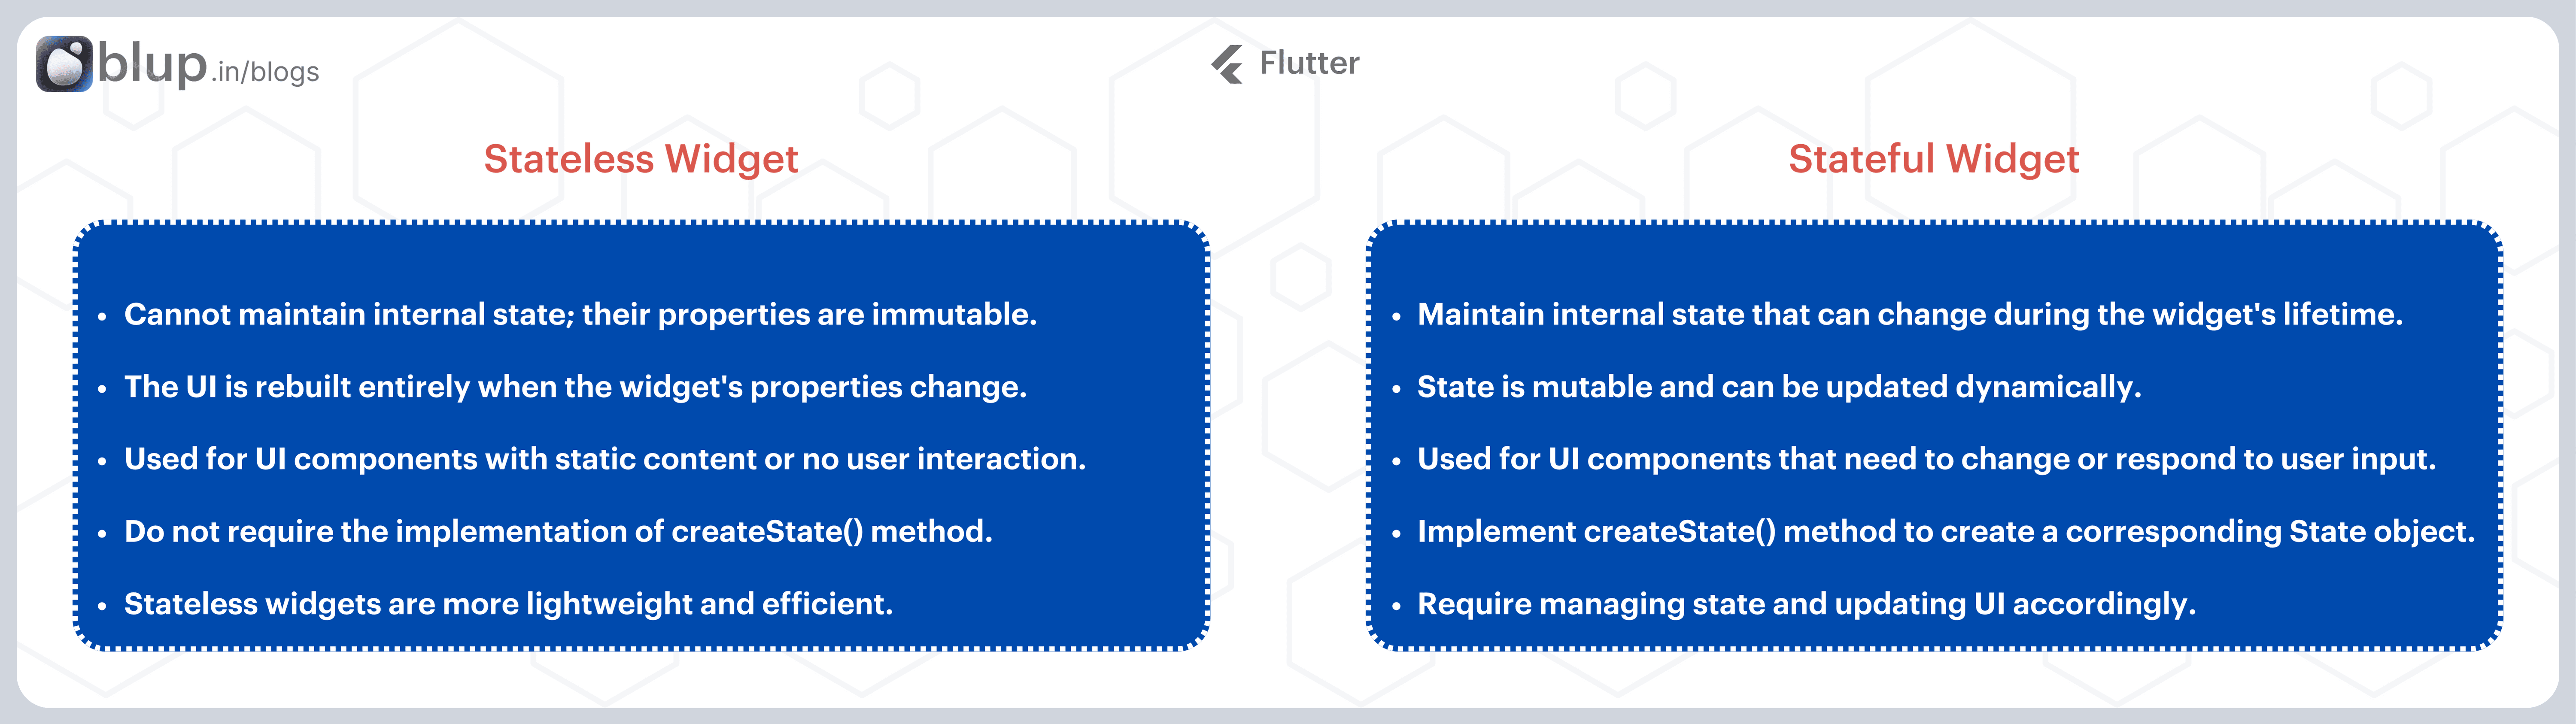
Stateful Widgets:
Maintain internal state that can change during the widget's lifetime.
Example: A counter app where the count value increments or decrements based on user interaction.
The state is mutable and can be updated dynamically.
Example: Updating the text of a button based on user input.
Used for UI components that need to change or respond to user input.
Example: A form that updates its fields based on user input.
Implement the createState() method to create a corresponding State object.
Example: The StatefulWidget class is used to define stateful widgets.
Require managing state and updating UI accordingly.
Example: Updating the UI to reflect changes in data fetched from an API.
Stateless Widgets:
Cannot maintain internal state; their properties are immutable.
Example: Displaying static content such as text or icons.
The UI is rebuilt entirely when the widget's properties change.
Example: Re-rendering a list of items based on changes in the underlying data.
Used for UI components with static content or no user interaction.
Example: Displaying a list of items fetched from a database.
Do not require the implementation of createState() method.
Example: The StatelessWidget class is used to define stateless widgets.
Stateless widgets are more lightweight and efficient.
Example: Displaying UI components that do not require frequent updates or interaction.
Boost Your Flutter Performance: Choosing the Right Widget (Stateful vs. Stateless).
In Flutter apps, widgets are the building blocks, broadly categorized into two types:
Stateless Widget
Stateful Widget
State:
Before knowing the difference between the stateless and stateful widget we should take a look at the definition of State of a widget.
The State is information that can be read synchronously when the widget is build and might change during the lifetime of the widget.
The state of an app can very simply be defined as anything that exists in the memory of the app while the app is running. This includes all the widgets that maintain the UI of the app including the buttons, text fonts, icons, animations, etc. So now as we know what are these states let’s dive directly into our main topic i.e what are these stateful and stateless widgets and how do they differ from one another?
In other words, the state of the widget is the data of the objects that its properties (parameters) are sustaining at the time of its creation (when the widget is painted on the screen). The state can also change when it is used for example when a CheckBox widget is clicked a check appears on the box.
Stateful Widgets:
Maintain internal state that can change during the widget's lifetime.
Example: A counter app where the count value increments or decrements based on user interaction.
The state is mutable and can be updated dynamically.
Example: Updating the text of a button based on user input.
Used for UI components that need to change or respond to user input.
Example: A form that updates its fields based on user input.
Implement the createState() method to create a corresponding State object.
Example: The StatefulWidget class is used to define stateful widgets.
Require managing state and updating UI accordingly.
Example: Updating the UI to reflect changes in data fetched from an API.
Stateless Widgets:
Cannot maintain internal state; their properties are immutable.
Example: Displaying static content such as text or icons.
The UI is rebuilt entirely when the widget's properties change.
Example: Re-rendering a list of items based on changes in the underlying data.
Used for UI components with static content or no user interaction.
Example: Displaying a list of items fetched from a database.
Do not require the implementation of createState() method.
Example: The StatelessWidget class is used to define stateless widgets.
Stateless widgets are more lightweight and efficient.
Example: Displaying UI components that do not require frequent updates or interaction.
Flutter – Stateful Widget
Flutter – Stateful Widget
Flutter – Stateful Widget
Flutter – Stateful Widget
Flutter Widgets Made Easy: Choose the Right One for Every Situation.
Stateful Widgets encapsulate mutable states within them. A solid grasp of widgets and state management is imperative to comprehend Stateful Widgets. A state, defined as "an imperative changing of the user interface," contrasts with a widget, which is "an immutable description of a part of the user interface." For further insight into widgets and state management, refer to the following articles:
What are Widgets in Flutter?
Flutter – State Management
Widgets are categorized into two types based on states:
Stateless Widget
Stateful Widget
This article focuses on Stateful Widgets, comprehensively understanding their functionality and usage.
What are Stateful Widgets?
Stateful Widgets maintain mutable states that can be modified based on user input. They are responsible for managing changes to the user interface and updating views accordingly. Stateful Widgets track changes in their state and trigger the build method to rebuild their child widgets when necessary. Some examples can be CheckBox, RadioButton, Form, and TextField.
import 'package:flutter/material.dart';

void main() => runApp(const MyApp());

class MyApp extends StatefulWidget {
  const MyApp({Key? key}) : super(key: key);

  @override
  // ignore: library_private_types_in_public_api
  _MyAppState createState() => _MyAppState();
}

class _MyAppState extends State<MyApp> {
  @override
  Widget build(BuildContext context) {
    return Container();
  }
}
These widgets are essential for scenarios where frequent updates or interactions are required, such as user input, interactions, or dynamic changes in the application. The basic structure of a Stateful Widget includes a Stateful Widget class and its corresponding State class.
A Stateful Widget can change when:
There is a User Input included
There are some User Interaction
There are some Dynamic Changes
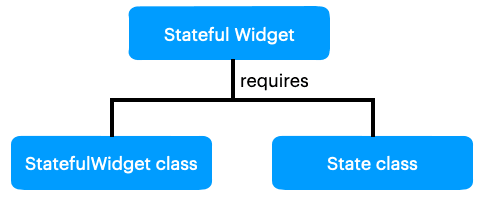
Given below is the basic structure of a Stateful Widget-
The MyApp is a class that extends the Stateful Widget. A generic method createState() creates a mutable state for the widget at a particular location and returns another class that is extended by the previous state. The _MyAppState class extends another state.
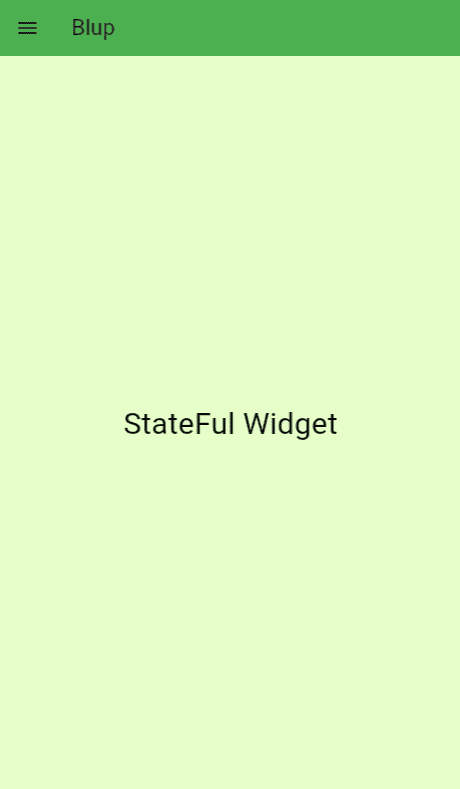
Example: Stateful Widget
import 'package:flutter/material.dart';
//This function triggers the build process
void main() => runApp(const MyApp());
// StatefulWidget
class MyApp extends StatefulWidget {
const MyApp({Key? key}) : super(key: key);
@override
// ignore: library_private_types_in_public_api
_MyAppState createState() => _MyAppState();
}
class _MyAppState extends State<MyApp> {
@override
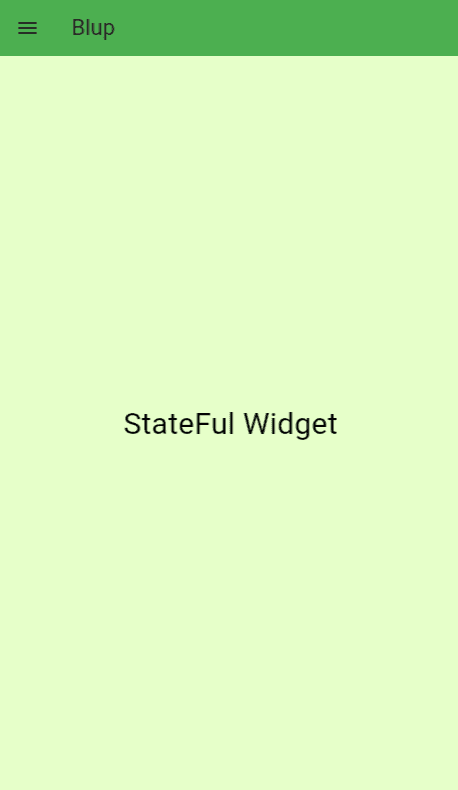
Widget build(BuildContext context) {
return MaterialApp(
debugShowCheckedModeBanner: false,
home: Scaffold(
backgroundColor: Color.fromARGB(255, 230, 255, 201),
appBar: AppBar(
leading: const Icon(Icons.menu),
backgroundColor: Colors.green,
title: const Text(
"Blup",
textAlign: TextAlign.start,
),
), // AppBar
body: const Center(
child: Text(
"StateFul Widget",
style: TextStyle(color: Colors.black, fontSize: 30),
),
), // Container
), // Scaffold
); // MaterialApp
}
}Output:
Flutter Widgets Made Easy: Choose the Right One for Every Situation.
Stateful Widgets encapsulate mutable states within them. A solid grasp of widgets and state management is imperative to comprehend Stateful Widgets. A state, defined as "an imperative changing of the user interface," contrasts with a widget, which is "an immutable description of a part of the user interface." For further insight into widgets and state management, refer to the following articles:
What are Widgets in Flutter?
Flutter – State Management
Widgets are categorized into two types based on states:
Stateless Widget
Stateful Widget
This article focuses on Stateful Widgets, comprehensively understanding their functionality and usage.
What are Stateful Widgets?
Stateful Widgets maintain mutable states that can be modified based on user input. They are responsible for managing changes to the user interface and updating views accordingly. Stateful Widgets track changes in their state and trigger the build method to rebuild their child widgets when necessary. Some examples can be CheckBox, RadioButton, Form, and TextField.
import 'package:flutter/material.dart';

void main() => runApp(const MyApp());

class MyApp extends StatefulWidget {
  const MyApp({Key? key}) : super(key: key);

  @override
  // ignore: library_private_types_in_public_api
  _MyAppState createState() => _MyAppState();
}

class _MyAppState extends State<MyApp> {
  @override
  Widget build(BuildContext context) {
    return Container();
  }
}
These widgets are essential for scenarios where frequent updates or interactions are required, such as user input, interactions, or dynamic changes in the application. The basic structure of a Stateful Widget includes a Stateful Widget class and its corresponding State class.
A Stateful Widget can change when:
There is a User Input included
There are some User Interaction
There are some Dynamic Changes
Given below is the basic structure of a Stateful Widget-
The MyApp is a class that extends the Stateful Widget. A generic method createState() creates a mutable state for the widget at a particular location and returns another class that is extended by the previous state. The _MyAppState class extends another state.
Example: Stateful Widget
import 'package:flutter/material.dart';

//This function triggers the build process
void main() => runApp(const MyApp());

// StatefulWidget
class MyApp extends StatefulWidget {
const MyApp({Key? key}) : super(key: key);

@override
// ignore: library_private_types_in_public_api
_MyAppState createState() => _MyAppState();
}

class _MyAppState extends State<MyApp> {
@override
Widget build(BuildContext context) {
	return MaterialApp(
	debugShowCheckedModeBanner: false,
	home: Scaffold(
		backgroundColor: Color.fromARGB(255, 230, 255, 201),
		appBar: AppBar(
		leading: const Icon(Icons.menu),
		backgroundColor: Colors.green,
		title: const Text(
			"Blup",
			textAlign: TextAlign.start,
		),
		), // AppBar
		body: const Center(
		child: Text(
			"StateFul Widget",
			style: TextStyle(color: Colors.black, fontSize: 30),
		),
		), // Container
	), // Scaffold
	); // MaterialApp
}
}
Output:
Flutter – Stateless Widget
Flutter – Stateless Widget
Flutter – Stateless Widget
Flutter – Stateless Widget
Dive into Stateless Widgets: Simplifying Flutter UI Development.

Stateless widgets are a fundamental building block in Flutter for creating user interfaces. These widgets are immutable, meaning their properties cannot change once they are initialized. They are ideal for representing static content that does not need to change based on user interaction or other factors.
In Flutter, a stateless widget is represented by a class that extends the StatelessWidget class. This class must implement a build method that returns the UI representation of the widget. Since stateless widgets do not hold any state, their build method is invoked only once during the widget's lifecycle.
Why Stateless Widgets?
When you create stateful widgets, you do it because you don’t want to use up memory in rebuilding everything on the screen.
Stateless widgets should be used for building parts of User interfaces, especially when the UI doesn’t need to be updated.
In doing so, we reserve resources and thereby optimize for performance.
Stateless widgets are lightweight and performant since they do not need to manage any internal state. They are commonly used to display static content such as text, images, icons, and buttons. Examples of stateless widgets include Text, Image, Icon, and RaisedButton.
Example:
import 'package:flutter/material.dart';

void main() => runApp(const MyApp());

class MyApp extends StatelessWidget {
  const MyApp({Key? key}) : super(key: key);

  @override
  Widget build(BuildContext context) {
    return Container();
  }
}
So let us see what this small code snippet tells us. The name of the stateless widget is MyApp which is being called from the runApp() and extends a stateless widget. Inside this MyApp a build function is overridden and takes BuildContext as a parameter. This BuildContext is unique to every widget as it is used to locate the widget inside the widget tree.
Note: The widgets of a Flutter application are displayed in the form of a Widget Tree where we connect the parent and child widgets to show a relationship between them which then combines to form the state of your app.
The build function contains a container which is again a widget of Flutter inside which we will design the UI of the app. In the stateless widget, the build function is called only once which makes the UI of the screen.
import 'package:flutter/material.dart';

//This function triggers the build process
void main() => runApp(const MyApp());

class MyApp extends StatelessWidget {
  const MyApp({Key? key}) : super(key: key);

  @override
  Widget build(BuildContext context) {
    return MaterialApp(
      debugShowCheckedModeBanner: false,
      home: Scaffold(
        backgroundColor: const Color.fromARGB(255, 230, 255, 201),
        appBar: AppBar(
          leading: const Icon(Icons.menu),
          backgroundColor: Colors.green,
          title: const Text(
            "Blup",
            textAlign: TextAlign.start,
          ),
        ), // AppBar
        body: const Center(
          child: Text(
            "Stateless Widget",
            style: TextStyle(color: Colors.black, fontSize: 30),
          ),
        ), // Container
      ), // Scaffold
    ); // MaterialApp
  }
Output:
Dive into Stateless Widgets: Simplifying Flutter UI Development.
Stateless widgets are a fundamental building block in Flutter for creating user interfaces. These widgets are immutable, meaning their properties cannot change once they are initialized. They are ideal for representing static content that does not need to change based on user interaction or other factors.
In Flutter, a stateless widget is represented by a class that extends the StatelessWidget class. This class must implement a build method that returns the UI representation of the widget. Since stateless widgets do not hold any state, their build method is invoked only once during the widget's lifecycle.
Why Stateless Widgets?
When you create stateful widgets, you do it because you don’t want to use up memory in rebuilding everything on the screen.
Stateless widgets should be used for building parts of User interfaces, especially when the UI doesn’t need to be updated.
In doing so, we reserve resources and thereby optimize for performance.
Stateless widgets are lightweight and performant since they do not need to manage any internal state. They are commonly used to display static content such as text, images, icons, and buttons. Examples of stateless widgets include Text, Image, Icon, and RaisedButton.
Example:
import 'package:flutter/material.dart';

void main() => runApp(const MyApp());

class MyApp extends StatelessWidget {
  const MyApp({Key? key}) : super(key: key);

  @override
  Widget build(BuildContext context) {
    return Container();
  }
}
So let us see what this small code snippet tells us. The name of the stateless widget is MyApp which is being called from the runApp() and extends a stateless widget. Inside this MyApp a build function is overridden and takes BuildContext as a parameter. This BuildContext is unique to every widget as it is used to locate the widget inside the widget tree.
Note: The widgets of a Flutter application are displayed in the form of a Widget Tree where we connect the parent and child widgets to show a relationship between them which then combines to form the state of your app.
The build function contains a container which is again a widget of Flutter inside which we will design the UI of the app. In the stateless widget, the build function is called only once which makes the UI of the screen.
import 'package:flutter/material.dart';

//This function triggers the build process
void main() => runApp(const MyApp());

class MyApp extends StatelessWidget {
  const MyApp({Key? key}) : super(key: key);

  @override
  Widget build(BuildContext context) {
    return MaterialApp(
      debugShowCheckedModeBanner: false,
      home: Scaffold(
        backgroundColor: const Color.fromARGB(255, 230, 255, 201),
        appBar: AppBar(
          leading: const Icon(Icons.menu),
          backgroundColor: Colors.green,
          title: const Text(
            "Blup",
            textAlign: TextAlign.start,
          ),
        ), // AppBar
        body: const Center(
          child: Text(
            "Stateless Widget",
            style: TextStyle(color: Colors.black, fontSize: 30),
          ),
        ), // Container
      ), // Scaffold
    ); // MaterialApp
  }
Output:
Exploring Important Widgets // Hands-On Practice // Advanced Techniques
Exploring Important Widgets // Hands-On Practice // Advanced Techniques
Exploring Important Widgets // Hands-On Practice // Advanced Techniques
Exploring Important Widgets // Hands-On Practice // Advanced Techniques
In this section, we delve into the essential widgets in Flutter, provide hands-on practice exercises, and explore advanced techniques for building dynamic and responsive user interfaces.
Exploring Important Widgets
Flutter offers a rich collection of widgets that enable developers to create stunning and interactive user interfaces. These widgets range from basic components like buttons and text fields to more complex elements such as lists, grids, and animations.
Text Widget: The Text widget is used to display text on the screen. It supports various styling options like font size, color, and alignment, making it versatile for displaying text content in Flutter apps.
Button Widgets: Flutter provides several button widgets like RaisedButton, FlatButton, and IconButton for creating interactive buttons. These widgets allow developers to customize button appearance and behavior according to their application requirements.
Container Widget: The Container widget is a versatile layout widget that allows developers to create custom UI elements by combining padding, margin, alignment, and decoration properties. It serves as a fundamental building block for designing UI layouts in Flutter.
ListView Widget: ListView is a scrollable list widget that displays a list of children's widgets vertically or horizontally. It is commonly used for displaying large datasets or dynamic content that requires scrolling.
Image Widget: The Image widget is used to display images in Flutter apps. It supports various image sources like networks, assets, and memory, making it flexible for loading and displaying images from different sources.
These are just a few examples of the many widgets available in Flutter. By mastering these widgets, developers can create visually appealing and feature-rich user interfaces for their apps.
Hands-On Practice
To reinforce your understanding of Flutter widgets, let's dive into some hands-on practice exercises:
Create a Simple Login Screen: Use the Text, TextField, and RaisedButton widgets to design a basic login screen with username and password fields and a login button.
Build a To-Do List App: Utilize the ListView widget to create a scrollable list of to-do items. Implement functionality to add, delete, and mark items as completed.
Design a Photo Gallery: Use the GridView widget to display a grid of images fetched from a network source. Add features like image loading indicators and onTap functionality to view full-size images.
These practice exercises will help you gain practical experience in using Flutter widgets and building real-world UI components.
Advanced Techniques
Once you're comfortable with the basics, you can explore advanced techniques for enhancing your Flutter apps:
Custom Paint: Learn how to create custom UI elements using the CustomPaint widget and the CustomPainter class. This allows you to implement custom shapes, animations, and visual effects in your app.
Animations: Explore Flutter's animation capabilities using the AnimationController, Tween, and AnimatedBuilder widgets. Create smooth animations for transitions, gestures, and UI elements to enhance the user experience.
State Management: Understand different state management approaches in Flutter, such as setState, Provider, Bloc, and Redux. Choose the appropriate state management solution based on your app's complexity and scalability requirements.
By mastering these advanced techniques, you can take your Flutter app development skills to the next level and build more sophisticated and responsive user interfaces.
Real-World Applications
Real-World Applications
Real-World Applications
Real-World Applications
In this section, we'll explore how Flutter's widget system is applied in real-world scenarios and discuss some notable examples of Flutter-powered applications.
Flutter in Real-World Applications
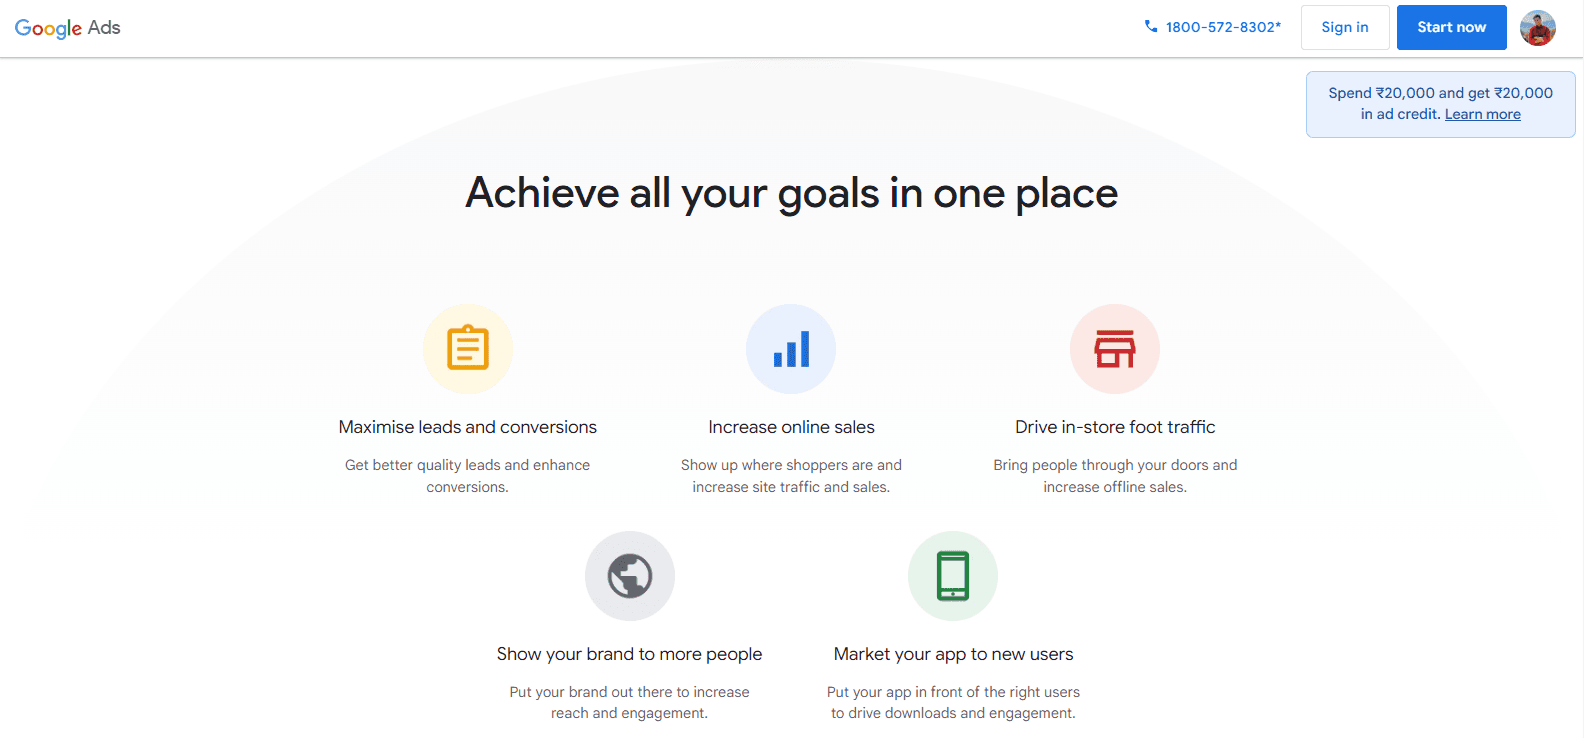
Google Ads: Google Ads is one of the flagship products of Google that helps businesses advertise their products and services online. The Google Ads app, available on both Android and iOS platforms, is built using Flutter. It provides advertisers with a convenient way to manage their ad campaigns on the go, offering features like campaign monitoring, budget management, and performance tracking.

Alibaba: Alibaba, the Chinese e-commerce giant, leverages Flutter for its global shopping platform. The Alibaba app, known for its extensive product catalog, seamless user experience, and high performance, is built using Flutter. With Flutter's cross-platform capabilities, Alibaba ensures a consistent user experience across different devices and operating systems, catering to its diverse user base worldwide.

Reflectly: Reflectly is a popular journaling and mindfulness app that helps users track their thoughts, moods, and emotions. Built entirely with Flutter, Reflectly offers a beautiful and intuitive user interface, personalized journaling prompts, and mood-tracking features. Flutter's flexibility and customizability enable Reflectly to deliver a seamless and engaging user experience, fostering mental well-being and self-reflection among its users.

Postmuse – Instagram photo editing app: Instagram is about to become the next Facebook. That is not an exaggeration; it is simply the way things are. Facebook is seen as a tool used by your elderly uncle to snoop on your high school graduation photos.
And with so many new companies now using Instagram, it’s only natural to have professional-looking Instagram images. This is where PostMuse enters the picture. Instagram allows you to view, edit, and design multiple Instagram photos.

Pairing: Pairing is a dating social app that is one of the most intuitive and basic examples of Flutter apps available. Dating is better than Pairing since links and matches are made via the users’ real-world communities. Developing apps with Flutter feels eerily similar to native production.
For instance, if you create an Android or iOS, they can require numerous interactions with both operating systems.
Otherwise, Flutter allows you to create optimized applications for both platforms using the same resource code.
Benefits of Using Flutter in Real-World Applications
Faster Development: Flutter's hot reload feature allows developers to make real-time changes to their code and see the results instantly, speeding up the development process significantly.
Cross-Platform Compatibility: With Flutter, developers can write code once and deploy it across multiple platforms, including iOS, Android, web, and desktop, saving time and resources.
Beautiful User Interfaces: Flutter's rich set of widgets, customizable animations, and material design principles empower developers to create visually stunning and highly interactive user interfaces that enhance the overall user experience.
High Performance: Flutter apps are compiled into native machine code, resulting in fast startup times, smooth animations, and excellent performance, even on low-end devices.
In this section, we'll explore how Flutter's widget system is applied in real-world scenarios and discuss some notable examples of Flutter-powered applications.
Flutter in Real-World Applications
Google Ads: Google Ads is one of the flagship products of Google that helps businesses advertise their products and services online. The Google Ads app, available on both Android and iOS platforms, is built using Flutter. It provides advertisers with a convenient way to manage their ad campaigns on the go, offering features like campaign monitoring, budget management, and performance tracking.
Alibaba: Alibaba, the Chinese e-commerce giant, leverages Flutter for its global shopping platform. The Alibaba app, known for its extensive product catalog, seamless user experience, and high performance, is built using Flutter. With Flutter's cross-platform capabilities, Alibaba ensures a consistent user experience across different devices and operating systems, catering to its diverse user base worldwide.
Reflectly: Reflectly is a popular journaling and mindfulness app that helps users track their thoughts, moods, and emotions. Built entirely with Flutter, Reflectly offers a beautiful and intuitive user interface, personalized journaling prompts, and mood-tracking features. Flutter's flexibility and customizability enable Reflectly to deliver a seamless and engaging user experience, fostering mental well-being and self-reflection among its users.
Postmuse – Instagram photo editing app: Instagram is about to become the next Facebook. That is not an exaggeration; it is simply the way things are. Facebook is seen as a tool used by your elderly uncle to snoop on your high school graduation photos.
And with so many new companies now using Instagram, it’s only natural to have professional-looking Instagram images. This is where PostMuse enters the picture. Instagram allows you to view, edit, and design multiple Instagram photos.
Pairing: Pairing is a dating social app that is one of the most intuitive and basic examples of Flutter apps available. Dating is better than Pairing since links and matches are made via the users’ real-world communities. Developing apps with Flutter feels eerily similar to native production.
For instance, if you create an Android or iOS, they can require numerous interactions with both operating systems.
Otherwise, Flutter allows you to create optimized applications for both platforms using the same resource code.
Benefits of Using Flutter in Real-World Applications
Faster Development: Flutter's hot reload feature allows developers to make real-time changes to their code and see the results instantly, speeding up the development process significantly.
Cross-Platform Compatibility: With Flutter, developers can write code once and deploy it across multiple platforms, including iOS, Android, web, and desktop, saving time and resources.
Beautiful User Interfaces: Flutter's rich set of widgets, customizable animations, and material design principles empower developers to create visually stunning and highly interactive user interfaces that enhance the overall user experience.
High Performance: Flutter apps are compiled into native machine code, resulting in fast startup times, smooth animations, and excellent performance, even on low-end devices.
Flutter App Development
Flutter App Development
Flutter App Development
Flutter App Development
Flutter App Development for Android and iOS
Creating app designs will include making trade-offs between the designer’s artistic vision and the realities of development.
Mobile designers and engineers often operate in parallel universes, isolated by a rigid distinction between the software they use and the difficulties inherent in iterating a concept during the development process.
Occasionally, the designer’s imagination is harmed by constraints in the APIs or frameworks used by the developer; sometimes, graphic polish is postponed until “later” due to other programming work (and “later” often means “never” in practice).
From the start, Flutter app development gives you complete control over any pixel on the device, including a comprehensive collection of widgets that offer pixel-perfect interactions on both iOS and Android.
Designers are using Flutter to develop visually appealing products such as Reflect which is the number one journaling tool on the Apple App Store.

Fast Apps on Each Platform
Rather than adding an abstraction layer between the code and the operating system, Flutter apps are native apps, which means they compile directly to iOS and Android devices.
Dart, Flutter’s programming language, is geared toward the needs of global audience users.
It’s simple to learn, includes a comprehensive collection of libraries and bundles that significantly reduce the amount of code you must write, and is optimized for developer success.
When you’re ready to release your app, compile it directly to the ARM machine code on your computer with the Flutter framework.
It means that what you write is exactly what appears on the system, allowing you to use the full power of your phone to develop a Flutter app rather than using a language like JavaScript that requires a different engine to run.
Productive App Creation on Each Platform
As a mobile application maker, you can feel as if you spend more time waiting than coding.
When you update the code, you must recompile it, deploy it over to a mobile device, and then restore the software to its previous state to see the changes.
In comparison, the Flutter app implements a new feature called Stateful Hot Reload that revolutionizes this production period by enabling updates to be executed in milliseconds—not minutes.
Additionally, a stateful hot reload enables improved communication between developers and designers when they choose to refine the app’s functionality and immediately see the results.
When developing applications, teams that use Stateful Hot Reload report significant efficiency gains.
By combining rapid change management with the opportunity to release on both iOS and Android, we’ve seen applications from brands like Hamilton and Reflectly go from creating their first line of code to being released in just weeks.
3 Quick Tips for Flutter Mobile App Development
Since we have spent considerable time investigating how much it costs to develop a flutter app and exploring the possibilities offered by the Flutter framework, we figured we’d share some tips with anyone considering creating a Flutter-based application:
While Flutter offers an easy way to create a beautiful user interface, you must exercise caution with pixel-perfect info.
Occasionally, a Flutter app needs some additional work due to the fact that there are still problems with designing fonts.
You must also be familiar with the Dart programming language to begin developing with Flutter.
However, there is no need to be concerned — it is elementary, and a professional mobile developer can pick it up quite quickly.
You can use Visual Studio Code or Android Studio for production purposes.
Flutter App Development for Android and iOS
Creating app designs will include making trade-offs between the designer’s artistic vision and the realities of development.
Mobile designers and engineers often operate in parallel universes, isolated by a rigid distinction between the software they use and the difficulties inherent in iterating a concept during the development process.
Occasionally, the designer’s imagination is harmed by constraints in the APIs or frameworks used by the developer; sometimes, graphic polish is postponed until “later” due to other programming work (and “later” often means “never” in practice).
From the start, Flutter app development gives you complete control over any pixel on the device, including a comprehensive collection of widgets that offer pixel-perfect interactions on both iOS and Android.
Designers are using Flutter to develop visually appealing products such as Reflect which is the number one journaling tool on the Apple App Store.
Fast Apps on Each Platform
Rather than adding an abstraction layer between the code and the operating system, Flutter apps are native apps, which means they compile directly to iOS and Android devices.
Dart, Flutter’s programming language, is geared toward the needs of global audience users.
It’s simple to learn, includes a comprehensive collection of libraries and bundles that significantly reduce the amount of code you must write, and is optimized for developer success.
When you’re ready to release your app, compile it directly to the ARM machine code on your computer with the Flutter framework.
It means that what you write is exactly what appears on the system, allowing you to use the full power of your phone to develop a Flutter app rather than using a language like JavaScript that requires a different engine to run.
Productive App Creation on Each Platform
As a mobile application maker, you can feel as if you spend more time waiting than coding.
When you update the code, you must recompile it, deploy it over to a mobile device, and then restore the software to its previous state to see the changes.
In comparison, the Flutter app implements a new feature called Stateful Hot Reload that revolutionizes this production period by enabling updates to be executed in milliseconds—not minutes.
Additionally, a stateful hot reload enables improved communication between developers and designers when they choose to refine the app’s functionality and immediately see the results.
When developing applications, teams that use Stateful Hot Reload report significant efficiency gains.
By combining rapid change management with the opportunity to release on both iOS and Android, we’ve seen applications from brands like Hamilton and Reflectly go from creating their first line of code to being released in just weeks.
3 Quick Tips for Flutter Mobile App Development
Since we have spent considerable time investigating how much it costs to develop a flutter app and exploring the possibilities offered by the Flutter framework, we figured we’d share some tips with anyone considering creating a Flutter-based application:
While Flutter offers an easy way to create a beautiful user interface, you must exercise caution with pixel-perfect info.
Occasionally, a Flutter app needs some additional work due to the fact that there are still problems with designing fonts.
You must also be familiar with the Dart programming language to begin developing with Flutter.
However, there is no need to be concerned — it is elementary, and a professional mobile developer can pick it up quite quickly.
You can use Visual Studio Code or Android Studio for production purposes.
Conclusion
Conclusion
Conclusion
Conclusion
As we come to the end of our exploration into Flutter widgets, it's clear that we've covered a lot of ground together. We've dived deep into understanding the nuances between stateful and stateless widgets, explored some essential widgets, rolled up our sleeves for hands-on practice, and even peeked into some advanced techniques.
But what's most exciting is how we've seen Flutter come to life in real-world applications. From powering Google Ads to enabling seamless user experiences on platforms like Alibaba, Flutter has proven its worth time and again. Its ability to craft beautiful interfaces and work across multiple platforms makes it a true game-changer in app development.
As we say goodbye for now, let's remember that Flutter isn't just a tool—it's a gateway to creativity and innovation. Whether you're just starting out or you've been coding for years, there's always something new to discover in the world of Flutter widgets.
Thank you for joining us on this journey. Here's to many more adventures in the world of app development. Happy coding!
Table of content


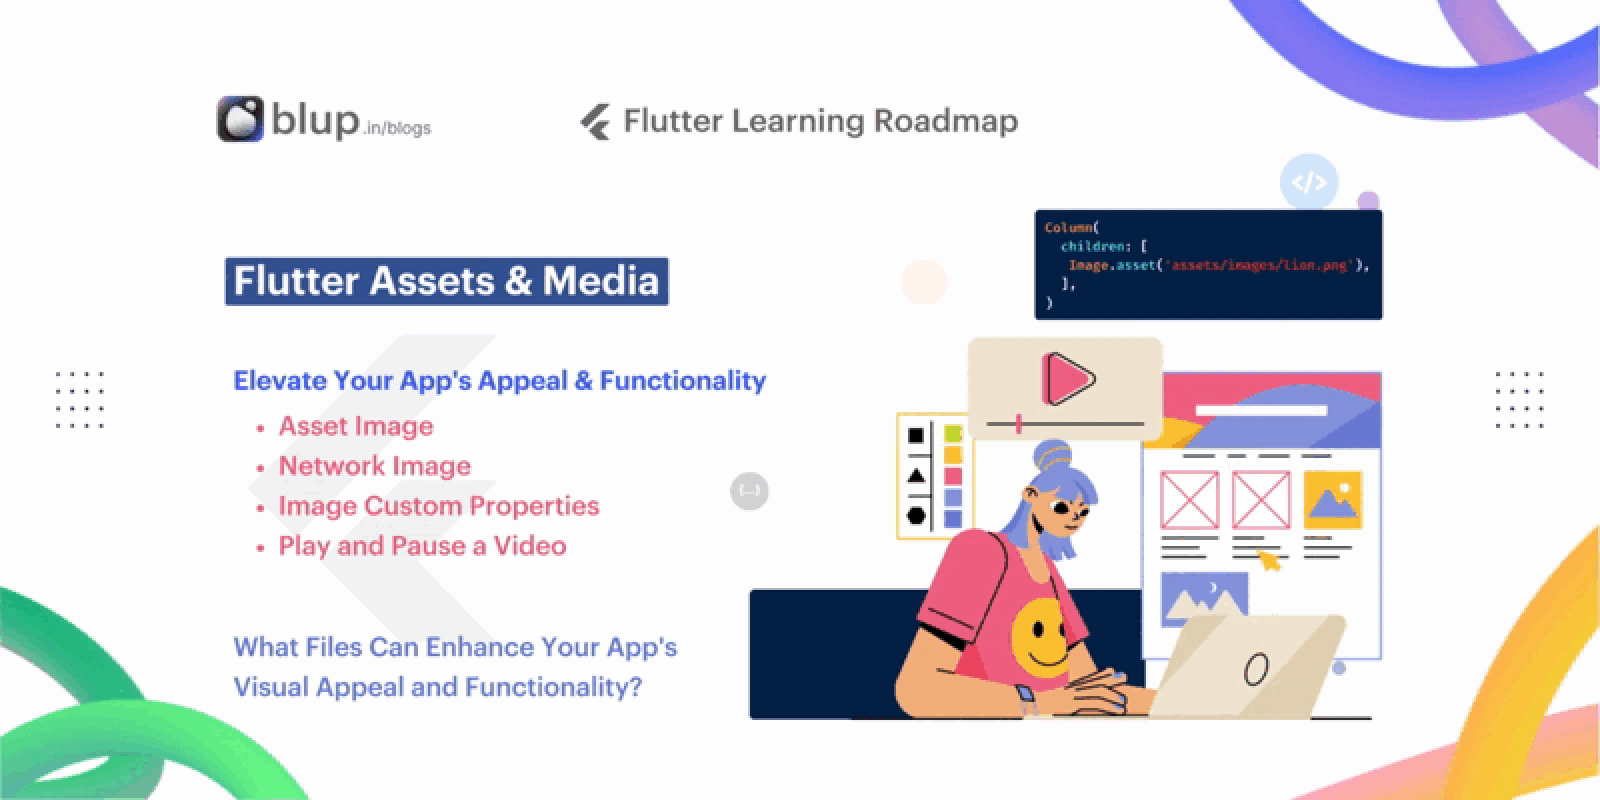


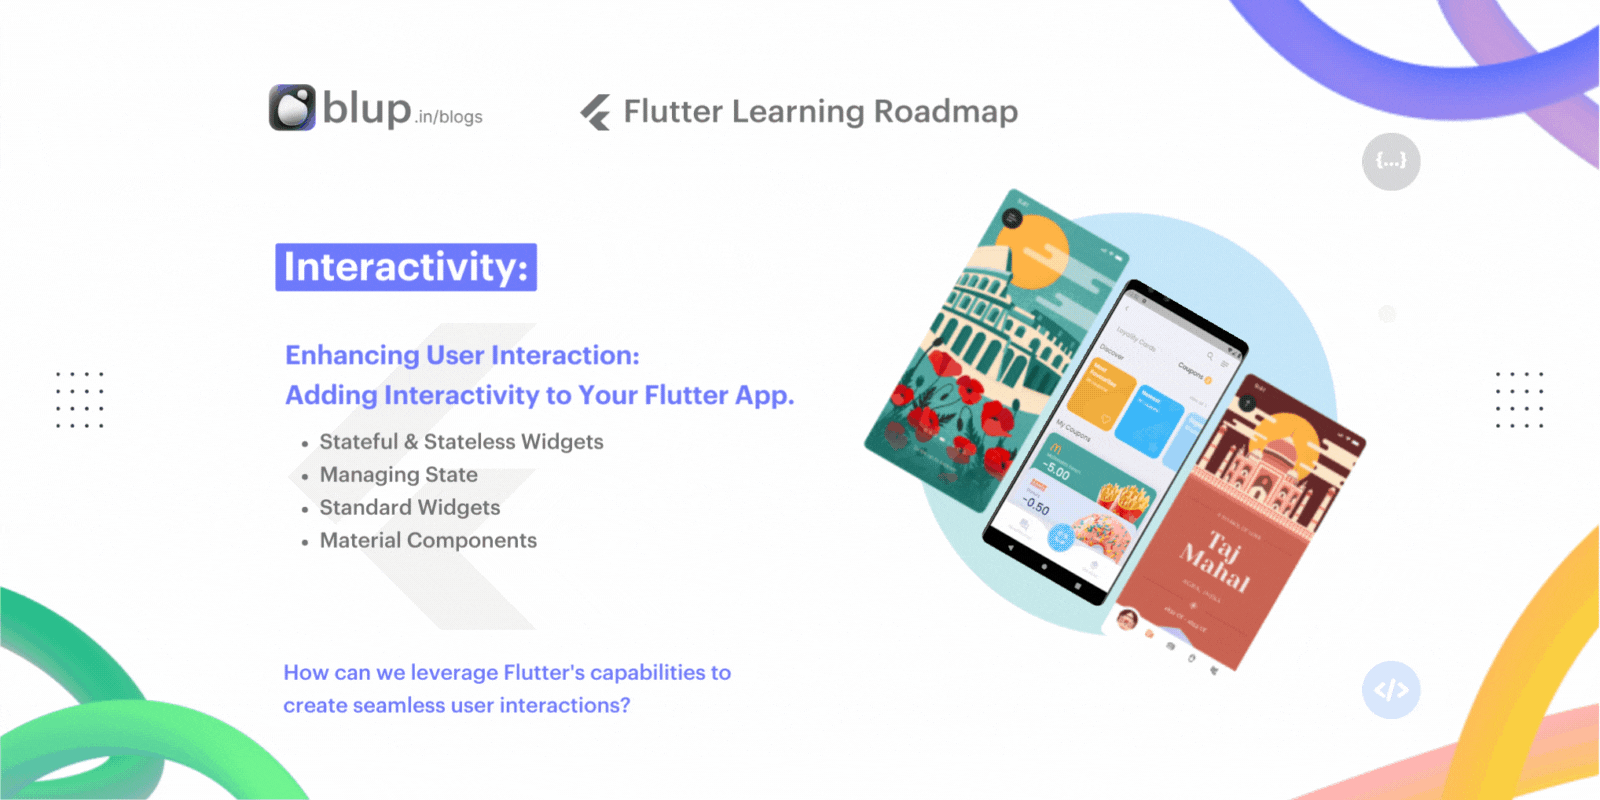
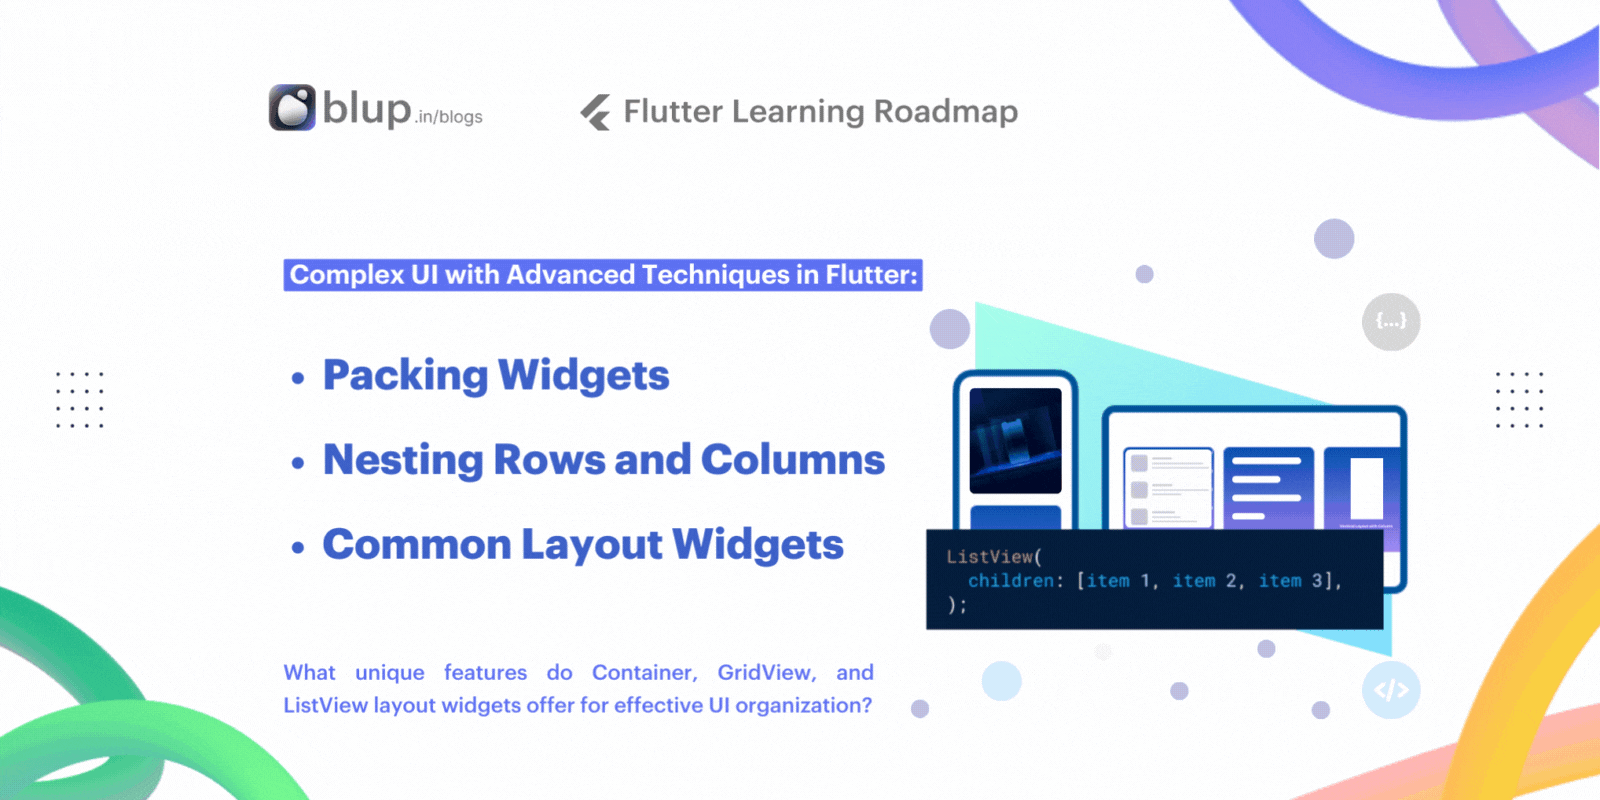


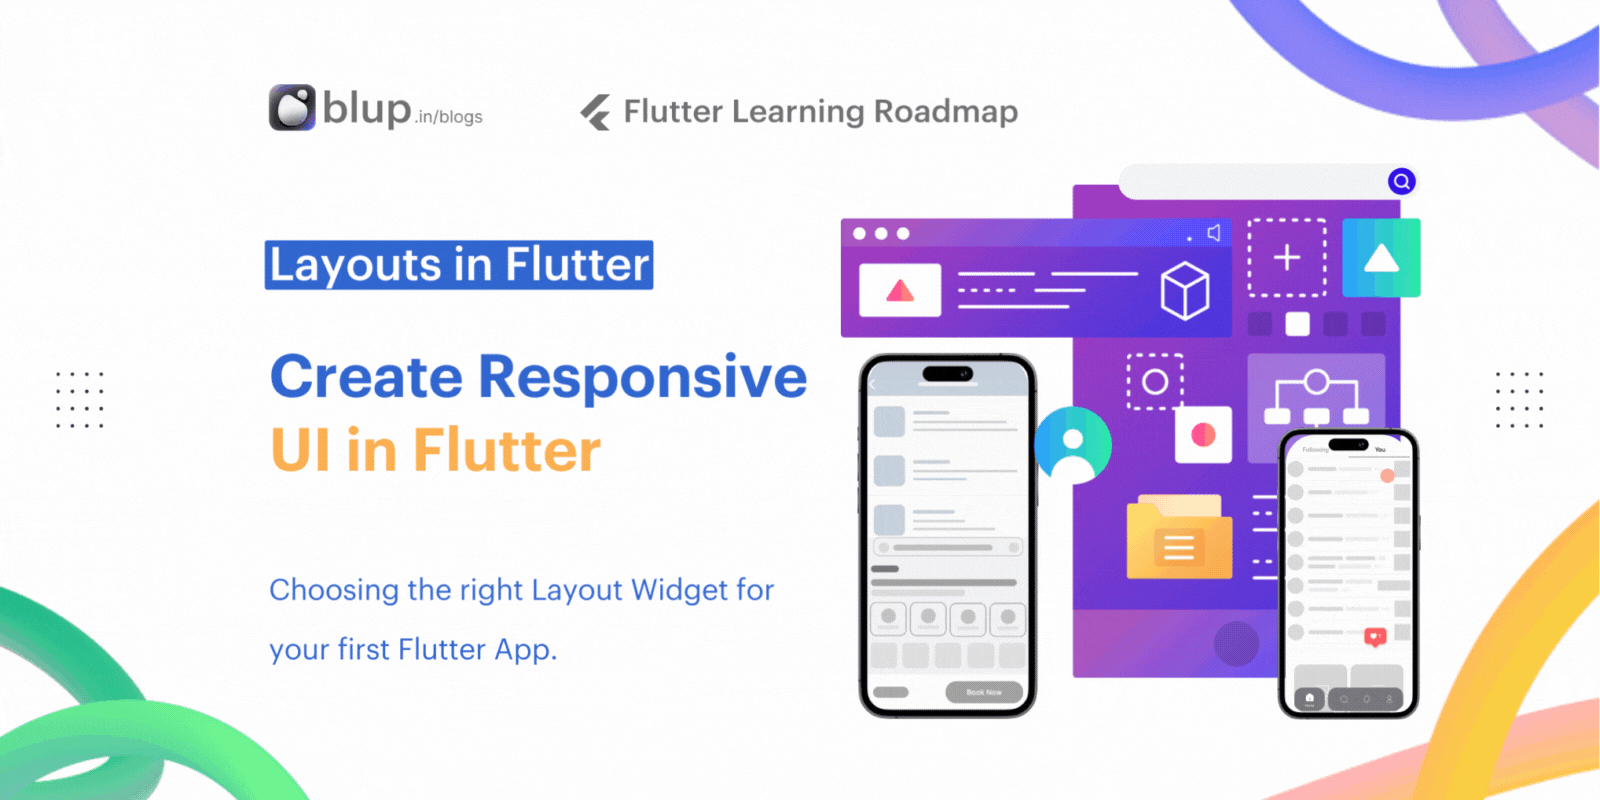

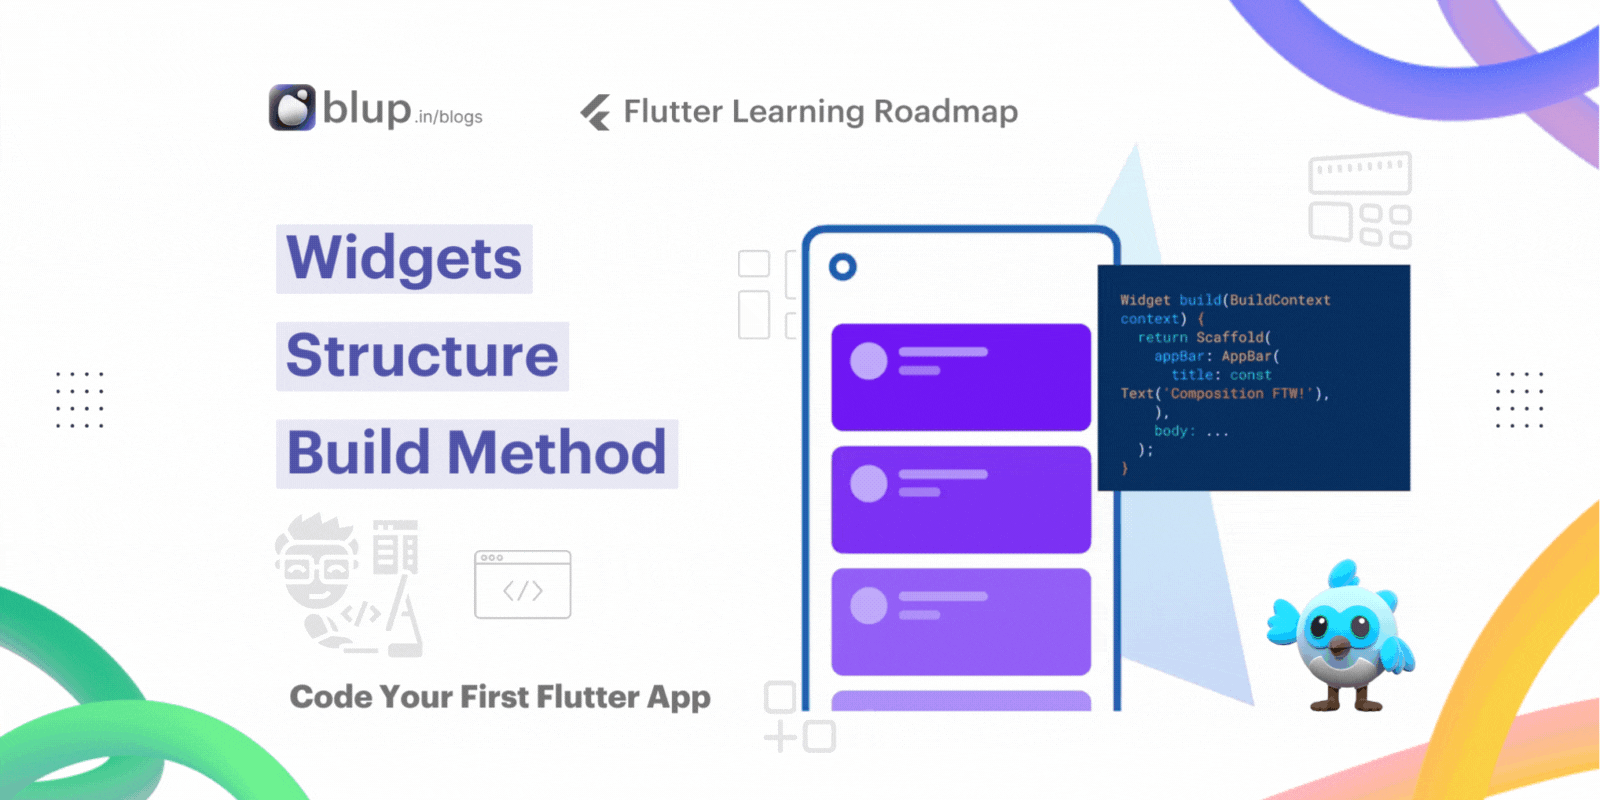


© 2021-25 Blupx Private Limited.
All rights reserved.
© 2021-25 Blupx Private Limited.
All rights reserved.
© 2021-25 Blupx Private Limited.
All rights reserved.