

How to Use setState in Flutter for Effective State Management
Introduction
Introduction
Introduction
Introduction
In Flutter, managing the state is crucial for building dynamic and interactive applications. State refers to the data that can change over time and affect how the UI is presented. For example, the state could include user inputs, app settings, or data fetched from a server. Effective state management ensures that the UI reflects these changes accurately and efficiently.
The Importance of setState
One of the fundamental tools for managing state in Flutter is the setState method. This method is used to update the internal state of a widget and trigger a rebuild of the widget tree. When you call setState, Flutter knows that something has changed and needs to refresh the UI accordingly. This allows developers to create responsive interfaces that react to user interactions and other state changes.
In this post, we'll dive into solving three core problems related to state management:
Passing an app’s state down the widget tree
Rebuilding widgets after updating the app’s state
Navigating between screens while keeping the state synchronized
By the end of this guide, you’ll have a solid grasp of how to utilize setState to manage state efficiently and enhance your Flutter applications.
What is setState?
What is setState?
What is setState?
What is setState?
In Flutter, setState is a crucial method used to manage and update the state of a StatefulWidget. When the state of a widget changes, setState notifies the framework that the widget needs to be rebuilt. This mechanism ensures that the UI reflects the most current state of the application.
Here’s how setState works: When you call setState, Flutter schedules a rebuild of the widget by marking it as "dirty". This means the widget will be re-rendered with the updated state, allowing the UI to display the latest changes. The rebuild process is efficient, focusing only on the parts of the UI that need updating.
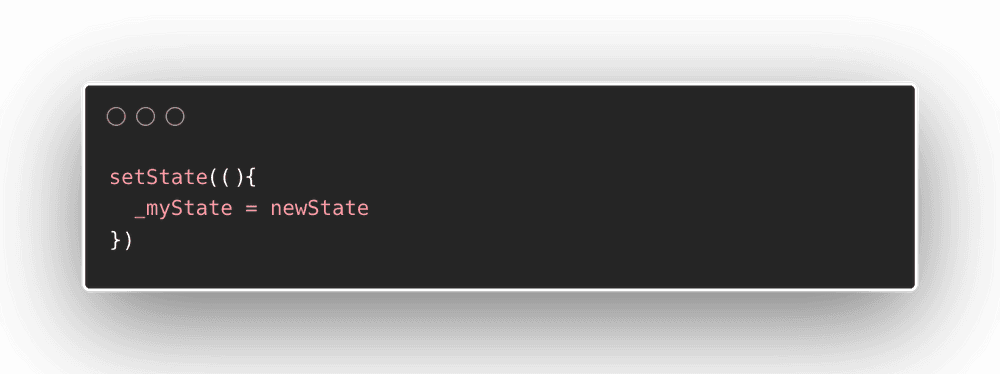
Basic Syntax and Usage:
setState(() {
  // Update state variables here
  counter++;
});
Advanced Example: For more complex scenarios, such as handling user input and asynchronous data updates, you might use setState as follows:
Future<void> _fetchData() async {
  final data = await fetchDataFromApi();
  setState(() {
    _data = data;
  });
}
In this example, setState is called with a callback function that updates the counter variable. Once setState is executed, Flutter rebuilds the widget to reflect the new counter value.
Summary: setState is essential for dynamic and interactive UIs in Flutter, enabling smooth updates and maintaining a responsive user experience.
In Flutter, setState is a crucial method used to manage and update the state of a StatefulWidget. When the state of a widget changes, setState notifies the framework that the widget needs to be rebuilt. This mechanism ensures that the UI reflects the most current state of the application.
Here’s how setState works: When you call setState, Flutter schedules a rebuild of the widget by marking it as "dirty". This means the widget will be re-rendered with the updated state, allowing the UI to display the latest changes. The rebuild process is efficient, focusing only on the parts of the UI that need updating.
Basic Syntax and Usage:
setState(() {
  // Update state variables here
  counter++;
});
Advanced Example: For more complex scenarios, such as handling user input and asynchronous data updates, you might use setState as follows:
Future<void> _fetchData() async {
  final data = await fetchDataFromApi();
  setState(() {
    _data = data;
  });
}
In this example, setState is called with a callback function that updates the counter variable. Once setState is executed, Flutter rebuilds the widget to reflect the new counter value.
Summary: setState is essential for dynamic and interactive UIs in Flutter, enabling smooth updates and maintaining a responsive user experience.
When to Use setState
When to Use setState
When to Use setState
When to Use setState
Simple State Changes:
setState is best suited for managing local state within a widget. For instance, if you have a counter or a toggle switch whose state is only relevant to that particular widget, setState is an ideal choice. It allows you to directly update the state and trigger a rebuild of the widget to reflect those changes. This approach keeps your state management straightforward and efficient for simple scenarios.
User Interactions:
setState is commonly used to update the UI in response to user interactions. For example, when a user presses a button or submits a form, setState can be employed to modify the state and instantly reflect those changes on the screen. This makes it easy to handle dynamic content and interactive elements, ensuring that your app remains responsive and engaging.
Small Widgets:
For smaller, less complex widgets, setState provides a quick and effective solution. If a widget’s state doesn’t need to be shared across multiple parts of your app or doesn’t involve complex logic, using setState is appropriate. It simplifies the code and keeps your state management focused on specific components without adding unnecessary overhead.

By using setState judiciously, you can manage state changes efficiently while maintaining a clear and readable codebase.
Simple State Changes:
setState is best suited for managing local state within a widget. For instance, if you have a counter or a toggle switch whose state is only relevant to that particular widget, setState is an ideal choice. It allows you to directly update the state and trigger a rebuild of the widget to reflect those changes. This approach keeps your state management straightforward and efficient for simple scenarios.
User Interactions:
setState is commonly used to update the UI in response to user interactions. For example, when a user presses a button or submits a form, setState can be employed to modify the state and instantly reflect those changes on the screen. This makes it easy to handle dynamic content and interactive elements, ensuring that your app remains responsive and engaging.
Small Widgets:
For smaller, less complex widgets, setState provides a quick and effective solution. If a widget’s state doesn’t need to be shared across multiple parts of your app or doesn’t involve complex logic, using setState is appropriate. It simplifies the code and keeps your state management focused on specific components without adding unnecessary overhead.
By using setState judiciously, you can manage state changes efficiently while maintaining a clear and readable codebase.
State Challenges
State Challenges
State Challenges
State Challenges
In developing a Flutter application, I encountered three key challenges related to state management:
How to pass an app’s state down to the widgets tree?
How to rebuild widgets after updating the app’s state?
How to navigate between screens and keep the state synced?
Passing State Down the Widget Tree: The first challenge was ensuring that state information could be passed efficiently down the widget tree. This means transferring data from parent widgets to child widgets so that each widget has access to the state it needs to render correctly.
Rebuilding Widgets After State Updates: The second challenge was managing how widgets rebuild in response to state changes. Whenever the state is updated, the affected widgets need to be rebuilt to reflect the new data. Ensuring that only the necessary parts of the widget tree are rebuilt helps maintain performance and responsiveness.
Navigating Between Screens with Synchronized State: The third challenge involved maintaining state consistency when navigating between different screens. It's essential to keep the state in sync across screens so that changes made on one screen are accurately reflected when returning to another. This requires a strategy for managing and preserving the state across multiple routes within the application.
Addressing these challenges effectively is crucial for building a responsive and well-functioning Flutter app. Understanding these aspects of state management helps in creating a smoother and more reliable user experience.
Execution
Execution
Execution
Execution
In Flutter, the entry point for the application is typically defined in the main.dart file. This file is where your app starts running. To demonstrate navigation and state management, I set up a simple app with two additional screens, MyHomePage.dart and MySecondPage.dart.
Application Overview:
Increment the Counter in MyHomePage: On the
MyHomePagescreen, users can increment a counter by pressing a button. The updated counter value is displayed on the screen.Navigate to MySecondPage: Users can navigate to the
MySecondPagescreen by pressing a button. This action preserves the counter's state, so when the user moves to the second page, the counter value is passed along.Decrement the Counter in MySecondPage: On
MySecondPage, users can decrement the counter. This screen also displays the updated counter value. When navigating back toMyHomePage, the counter reflects the changes made onMySecondPage.
Updated Example Code:
1. main.dart
This is the entry point of the Flutter application. It sets up the app and initializes the state.
import 'package:flutter/material.dart';
import 'MyHomePage.dart';

void main() => runApp(MyApp());

class MyApp extends StatefulWidget {
  @override
  _MyAppState createState() => _MyAppState();
}

class _MyAppState extends State<MyApp> {
  int counter = 0;

  void _incrementCounter() {
    setState(() {
      counter++;
    });
  }

  void _decrementCounter() {
    setState(() {
      counter--;
    });
  }

  @override
  Widget build(BuildContext context) {
    return MaterialApp(
      title: 'Flutter Demo',
      theme: ThemeData(primarySwatch: Colors.blue),
      home: MyHomePage(
        title: 'Home Page',
        counter: counter,
        incrementCounter: _incrementCounter,
        decrementCounter: _decrementCounter,
      ),
    );
  }
}
void main() => runApp(MyApp());: This is the entry point of the application, whereMyAppis the root widget.MyAppClass: AStatefulWidgetthat maintains the state of thecounterand provides methods to increment and decrement it._incrementCounterand_decrementCounterMethods: These methods usesetStateto update thecounterand trigger a rebuild of the widget tree.buildMethod: Constructs the widget tree, setting up theMaterialAppwithMyHomePageas the home screen and passing thecounter,incrementCounter, anddecrementCounteras parameters.
2. MyHomePage.dart
This screen displays the current value of the counter and allows navigation to the second screen.
import 'package:flutter/material.dart';
import 'MySecondPage.dart';

class MyHomePage extends StatelessWidget {
  final String title;
  final int counter;
  final VoidCallback incrementCounter;
  final VoidCallback decrementCounter;

  MyHomePage({this.title, this.counter, this.incrementCounter, this.decrementCounter});

  @override
  Widget build(BuildContext context) {
    return Scaffold(
      appBar: AppBar(title: Text(title)),
      body: Center(
        child: Column(
          mainAxisAlignment: MainAxisAlignment.center,
          children: <Widget>[
            Text('Counter: $counter'),
            ElevatedButton(
              onPressed: incrementCounter,
              child: Text('Increment'),
            ),
            ElevatedButton(
              onPressed: () {
                Navigator.push(
                  context,
                  MaterialPageRoute(
                    builder: (context) => MySecondPage(
                      counter: counter,
                      decrementCounter: decrementCounter,
                    ),
                  ),
                );
              },
              child: Text('Go to Second Page'),
            ),
          ],
        ),
      ),
    );
  }
}MyHomePageClass: AStatelessWidgetthat takestitle,counter,incrementCounter, anddecrementCounteras parameters.buildMethod: Constructs the widget tree for this screen, including:A
Textwidget displaying the currentcounter.An
ElevatedButtonto increment the counter, triggering theincrementCountercallback.An
ElevatedButtonto navigate toMySecondPage, passing along the currentcounteranddecrementCountercallback.
3. MySecondPage.dart
This screen allows decrementing the counter and shows the updated counter value.
import 'package:flutter/material.dart';

class MySecondPage extends StatelessWidget {
  final int counter;
  final VoidCallback decrementCounter;

  MySecondPage({this.counter, this.decrementCounter});

  @override
  Widget build(BuildContext context) {
    return Scaffold(
      appBar: AppBar(title: Text('Second Page')),
      body: Center(
        child: Column(
          mainAxisAlignment: MainAxisAlignment.center,
          children: <Widget>[
            Text('Counter: $counter'),
            ElevatedButton(
              onPressed: decrementCounter,
              child: Text('Decrement'),
            ),
          ],
        ),
      ),
    );
  }
}MySecondPageClass: AStatelessWidgetthat takescounteranddecrementCounteras parameters.buildMethod: Construct the widget tree for this screen, including:A
Textwidget displaying the currentcounter.An
ElevatedButtonto decrement the counter, triggering thedecrementCountercallback.
Simple Example - Changing the theme colour
Simple Example - Changing the theme colour
Simple Example - Changing the theme colour
Simple Example - Changing the theme colour
In this tutorial, we'll build a simple desktop app that changes its theme color when a button is pressed. We'll keep the entire app in one file to demonstrate how setState() functions within Flutter.
Understanding setState() and StatefulWidget
As a reminder, setState() works exclusively with StatefulWidget. For this example, we’ll implement our app as a StatefulWidget to manage state changes efficiently.
simple_theme_color_app.dart
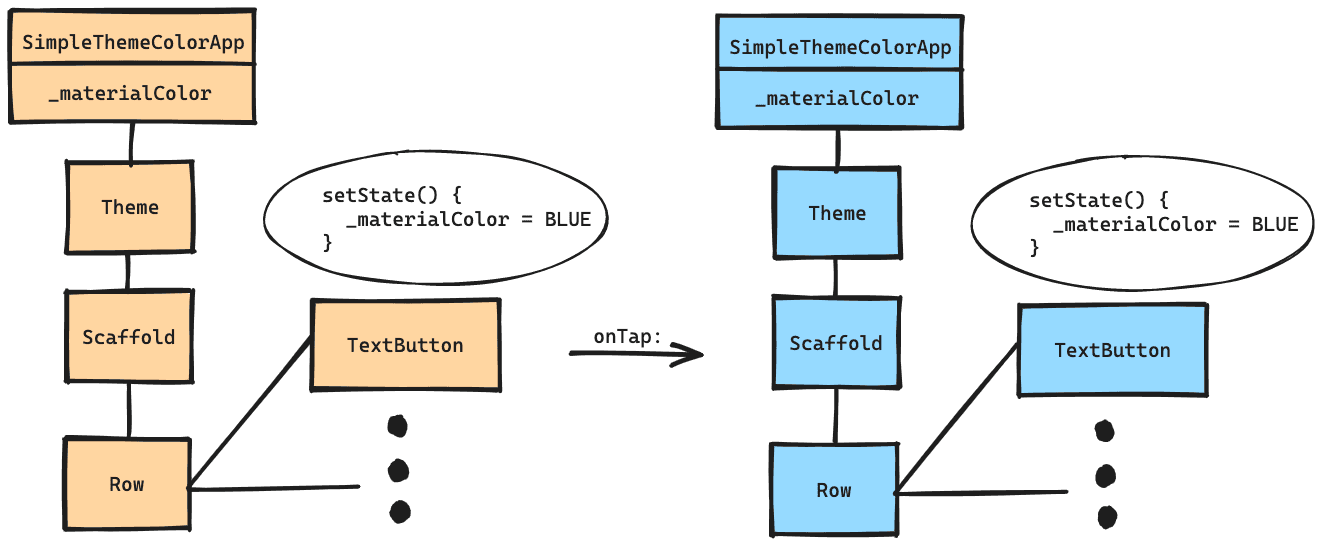
The widget, SimpleThemeColorApp, extends StatefulWidget, allowing us to maintain a state—the current theme color, _materialColor, which defaults to blue.
import 'package:flutter/material.dart';

class SimpleThemeColorApp extends StatefulWidget {
  const SimpleThemeColorApp({Key? key}) : super(key: key);

  @override
  State<SimpleThemeColorApp> createState() => _SimpleThemeColorAppState();
}

class _SimpleThemeColorAppState extends State<SimpleThemeColorApp> {
  MaterialColor _materialColor = Colors.blue;

  @override
  Widget build(BuildContext context) {
    return Theme(
      data: ThemeData.from(
        colorScheme: ColorScheme.fromSwatch(
          primarySwatch: _materialColor,
        ),
      ),
      child: Scaffold(
        body: Row(
          children: [
            TextButton(
              onPressed: () {
                _setNewState(Colors.blue);
              },
              child: const Text('Blue'),
            ),
            TextButton(
              onPressed: () {
                _setNewState(Colors.orange);
              },
              child: const Text('Orange'),
            ),
          ],
        ),
      ),
    );
  }

  void _setNewState(MaterialColor color) {
    setState(() {
      _materialColor = color;
    });
  }
}
Updating the Theme Using setState()
To change the theme color, we'll add an onTap listener to the button that triggers the setState() method. Inside the callback, we'll update _materialColor with the new value to reflect the change.
In this tutorial, we'll build a simple desktop app that changes its theme color when a button is pressed. We'll keep the entire app in one file to demonstrate how setState() functions within Flutter.
Understanding setState() and StatefulWidget
As a reminder, setState() works exclusively with StatefulWidget. For this example, we’ll implement our app as a StatefulWidget to manage state changes efficiently.
simple_theme_color_app.dart
The widget, SimpleThemeColorApp, extends StatefulWidget, allowing us to maintain a state—the current theme color, _materialColor, which defaults to blue.
import 'package:flutter/material.dart';

class SimpleThemeColorApp extends StatefulWidget {
  const SimpleThemeColorApp({Key? key}) : super(key: key);

  @override
  State<SimpleThemeColorApp> createState() => _SimpleThemeColorAppState();
}

class _SimpleThemeColorAppState extends State<SimpleThemeColorApp> {
  MaterialColor _materialColor = Colors.blue;

  @override
  Widget build(BuildContext context) {
    return Theme(
      data: ThemeData.from(
        colorScheme: ColorScheme.fromSwatch(
          primarySwatch: _materialColor,
        ),
      ),
      child: Scaffold(
        body: Row(
          children: [
            TextButton(
              onPressed: () {
                _setNewState(Colors.blue);
              },
              child: const Text('Blue'),
            ),
            TextButton(
              onPressed: () {
                _setNewState(Colors.orange);
              },
              child: const Text('Orange'),
            ),
          ],
        ),
      ),
    );
  }

  void _setNewState(MaterialColor color) {
    setState(() {
      _materialColor = color;
    });
  }
}
Updating the Theme Using setState()
To change the theme color, we'll add an onTap listener to the button that triggers the setState() method. Inside the callback, we'll update _materialColor with the new value to reflect the change.
Alternatives to setStates
Alternatives to setStates
Alternatives to setStates
Alternatives to setStates
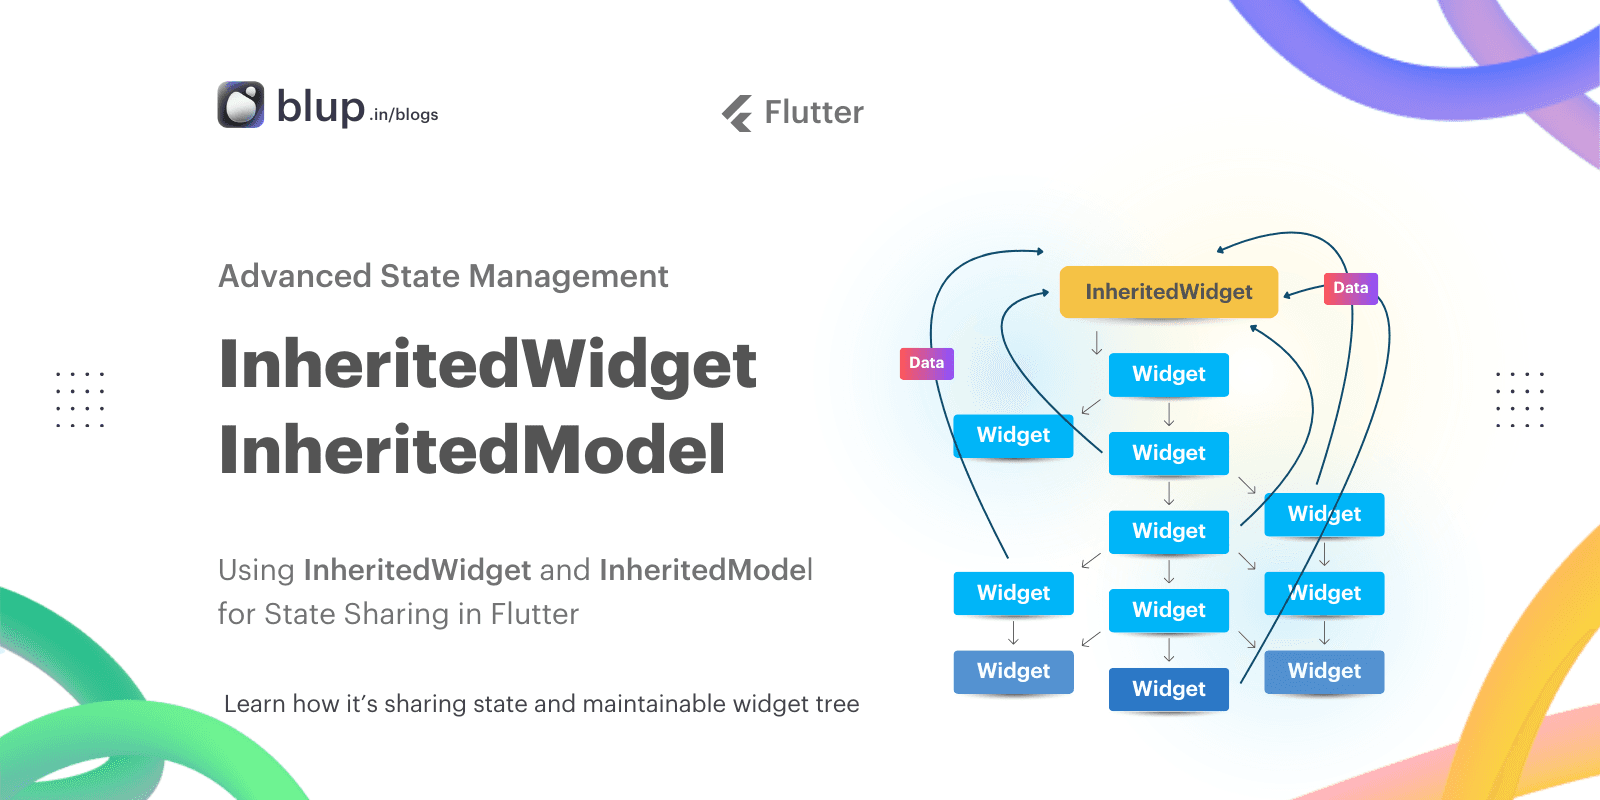
InheritedWidget and InheritedModel: For a state that needs to be shared across multiple widgets, consider using InheritedWidget or InheritedModel. These built-in Flutter classes allow data to be efficiently propagated down the widget tree without explicitly passing it through constructors. They are ideal for sharing state-like theme data or app-wide configurations.
Provider: Provider is a popular state management solution in Flutter that offers greater flexibility and scalability compared to setState. It allows you to manage complex state and dependency injection more effectively. With Provider, you can create scoped states and easily access them from different parts of the app, making it a robust choice for large-scale applications.
Conclusion
Conclusion
Conclusion
Conclusion
In summary, setState is a fundamental tool in Flutter for managing widget state and rebuilding the UI. It is crucial for handling simple state changes but should be used judiciously to avoid performance pitfalls. In this post, I've tackled and resolved three key challenges in Flutter state management:
Passing State Down the Widget Tree: ✅ I demonstrated how to pass state from a parent widget to child widgets, ensuring that state updates are reflected across different parts of the widget tree.
Rebuilding Widgets After State Updates: ✅ Using
setState, I explained how to trigger widget rebuilds when the app's state changes, ensuring that the UI remains in sync with the current state.Navigating Between Screens While Syncing State: ✅ I showed how to manage navigation between screens while keeping the state consistent, using callbacks to pass state changes between different pages in the app.
Experiment with setState to understand its impact on your app's performance and explore alternatives Provider for more complex state management needs. For further learning, check out related resources and tutorials on state management in Flutter.
Explore more:
FAQs
FAQs
FAQs
FAQs
What happens if I call
setStatemultiple times in a row? CallingsetStatemultiple times in quick succession will trigger multiple rebuilds of the widget. While Flutter optimizes rebuilds, excessive calls can still impact performance. Consider combining state updates if possible.How does
setStateinteract with asynchronous operations? When usingsetStateasynchronous operations, ensure you check if the widget is still mounted before callingsetState. This avoids errors from updating the state after the widget is disposed of.When should I consider using alternatives to
setState? Consider using alternatives likeProviderorInheritedWidgetfor managing complex or global state that needs to be shared across multiple widgets. These solutions offer more scalability and flexibility compared tosetState.
Table of content


© 2021-26 Blupx Private Limited.
All rights reserved.
© 2021-26 Blupx Private Limited.
All rights reserved.
© 2021-26 Blupx Private Limited.
All rights reserved.